Getting Started
Ready to start using Banyan to process large-scale datasets with automatic instant data sampling?
Getting started with Banyan is easy! Follow this tutorial to set up your account with Banyan, view the Banyan dashboard, and install the Julia client library and/or the Python client library. Then, you can create an auto-scaling cluster and start running sessions , processing numerical data, tabular data, images, and running ML models and custom scripts.
Setting up Your Account
Follow the steps in this section to set up your Banyan account so your team can start running computing sessions on auto-scaling clusters in the cloud.
If your organization already has a Banyan account, you can skip the steps in this section and simply join as a member and then learn how to use the dashboard, the Julia client library, and the Python client library.
Your AWS Account
Banyan uses AWS to manage underlying compute resources. If you don't already have an AWS account, please follow the instructions here to create an AWS account.
Your Banyan Account
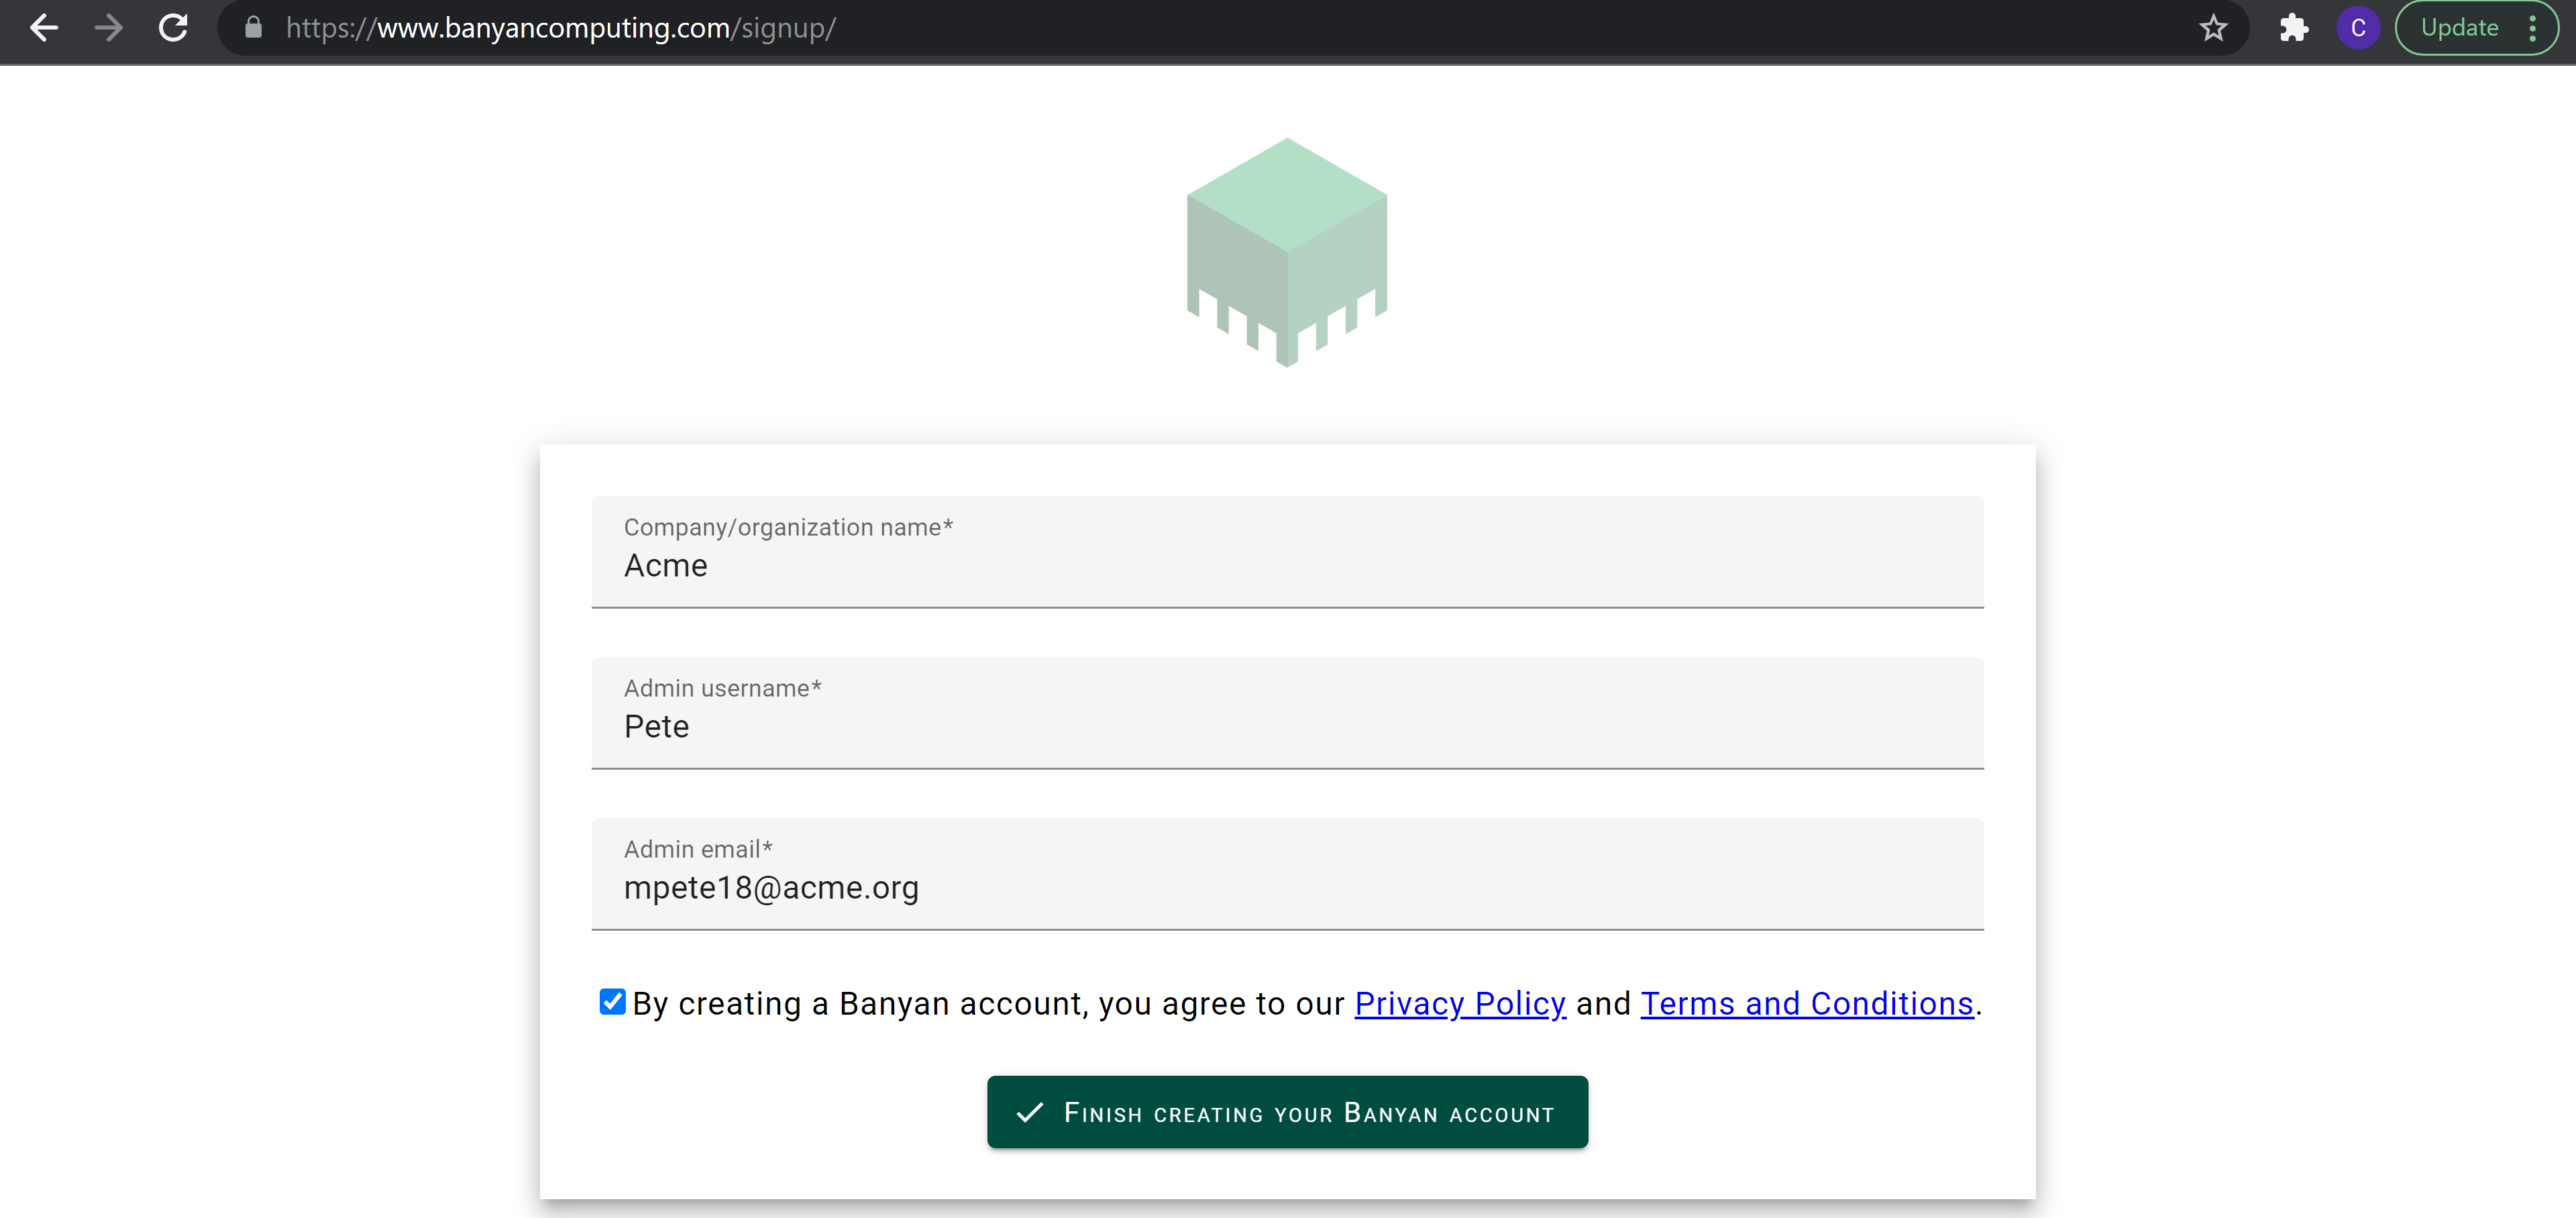
- Create a new Banyan account here.
- Fill out the fields with your information. If you plan to use this account as
an individual, you can use some unique name for the "Organization Name", such as
your full name.
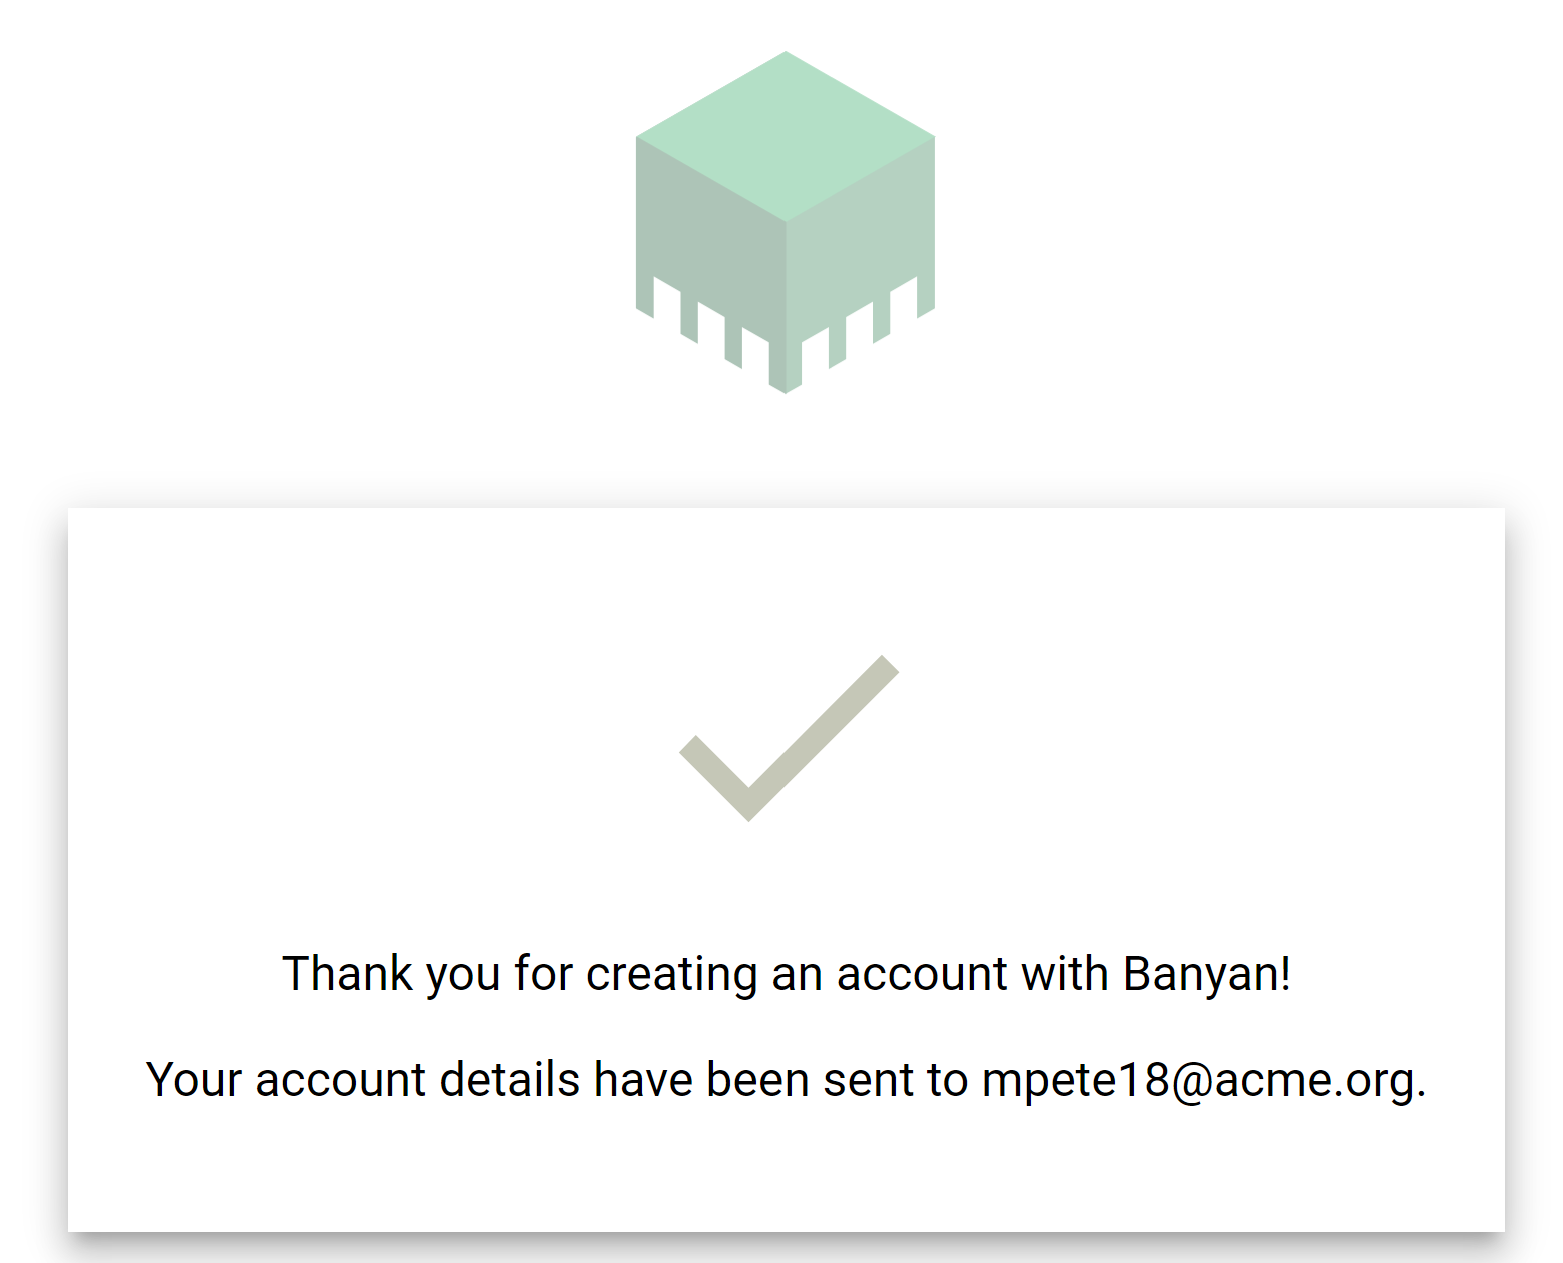
- A temporary password will be sent to your email address. Check your email
for a temporary password for Banyan from no-reply@verificationemail.com.
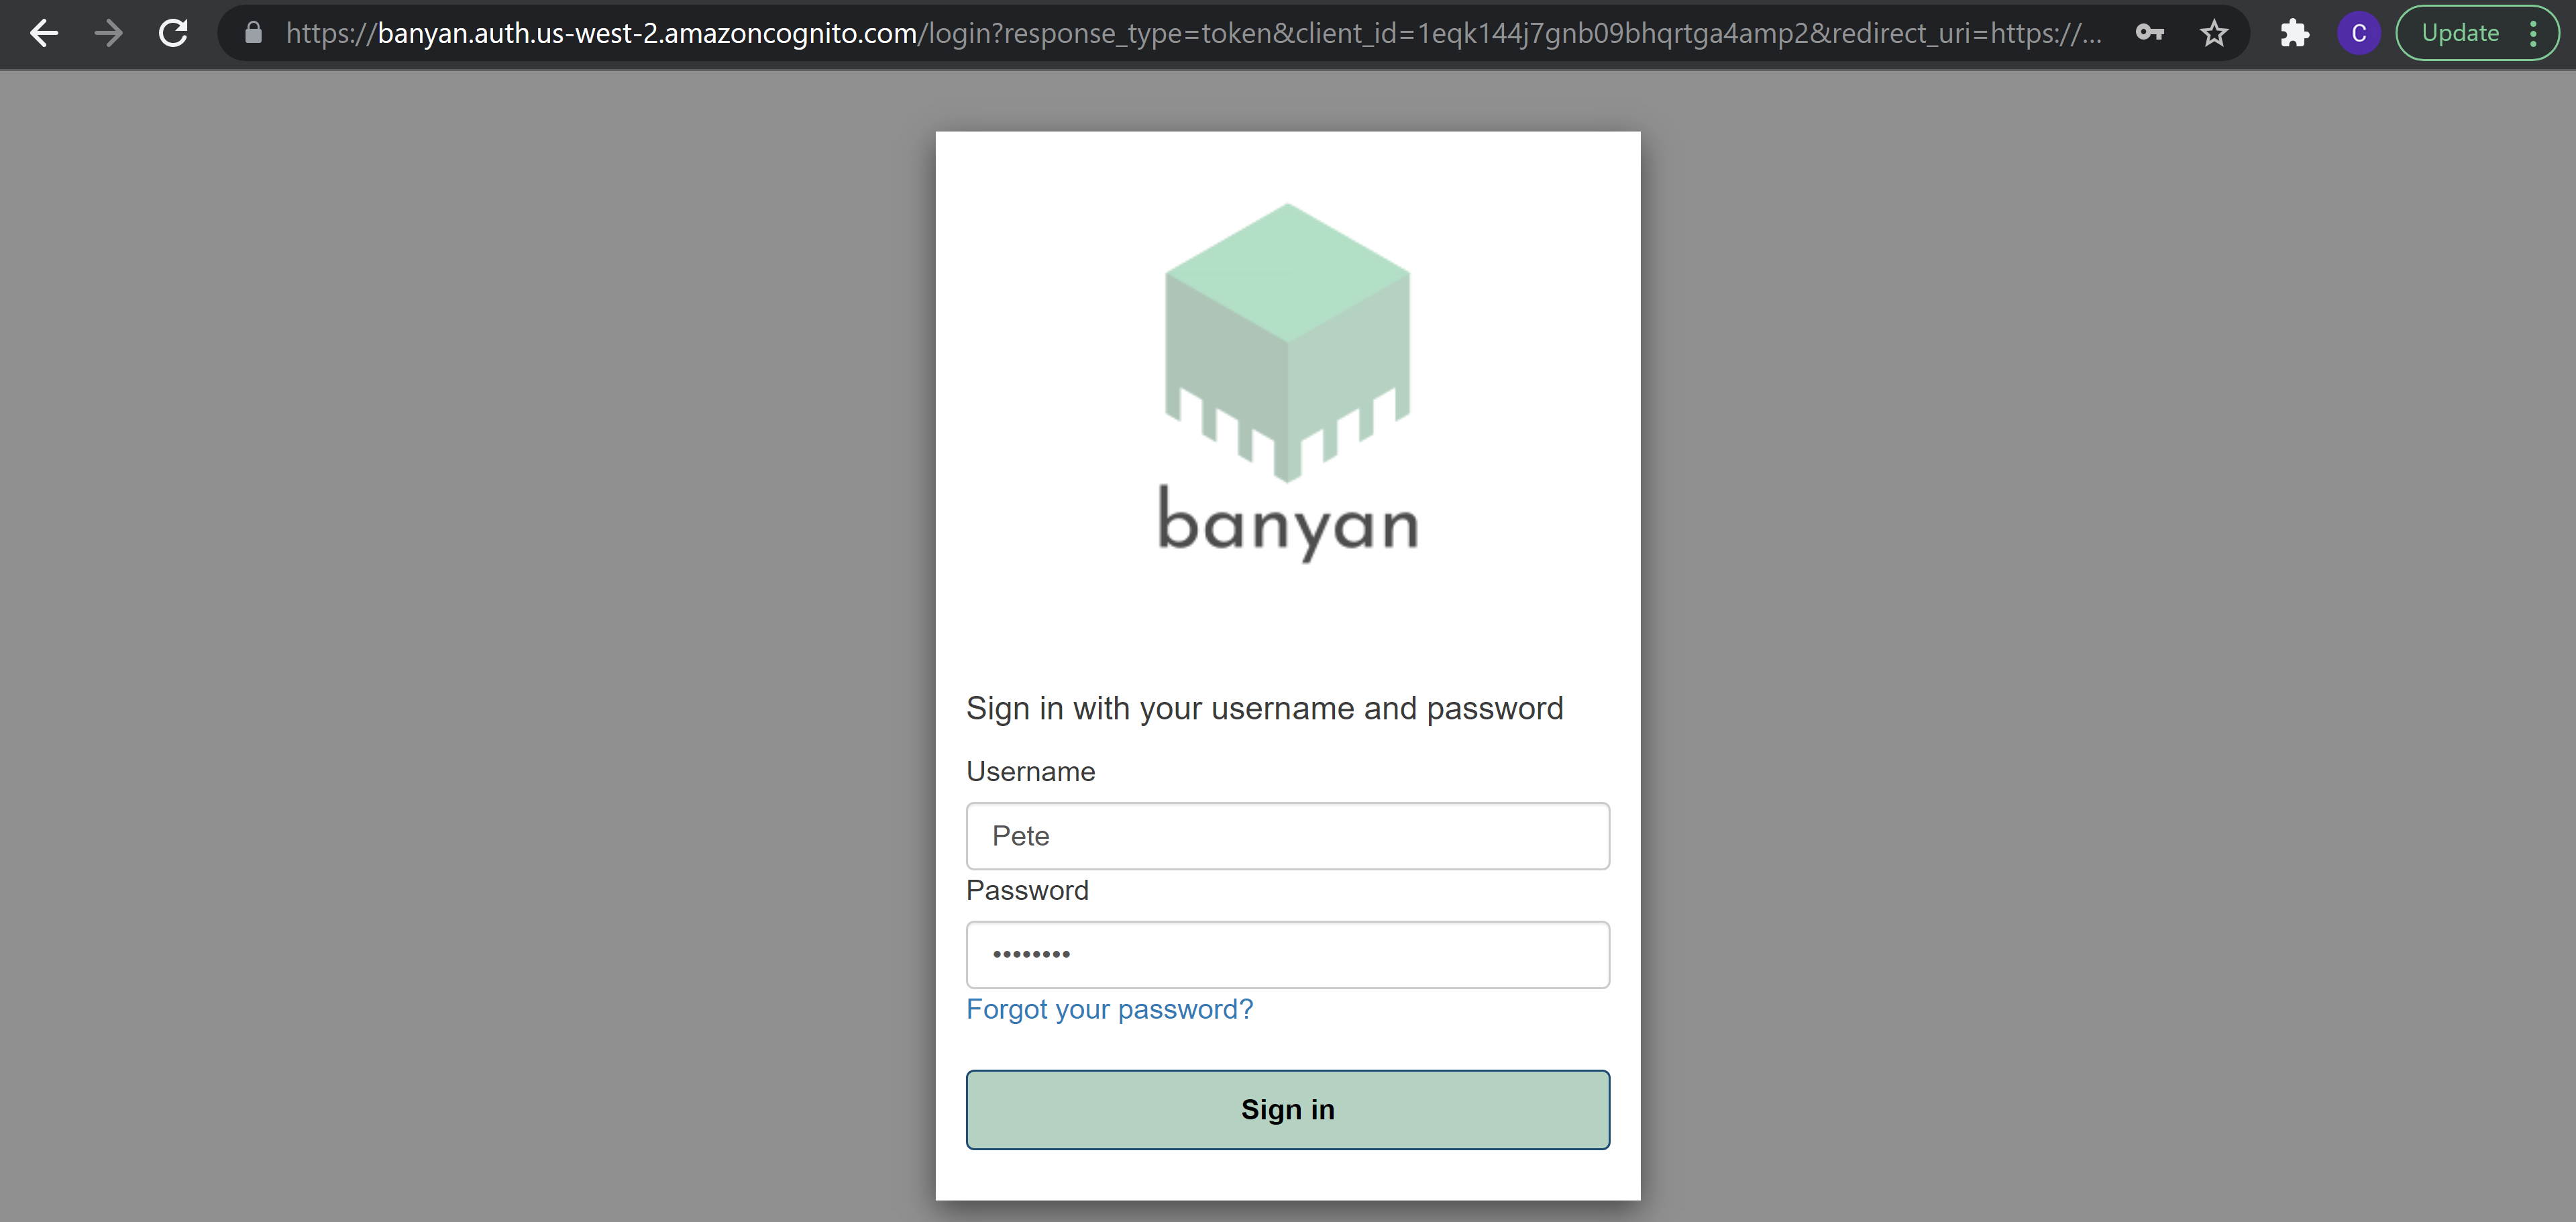
- Please login here
with your username and the temporary password in the email. You will be
redirected to set your password.
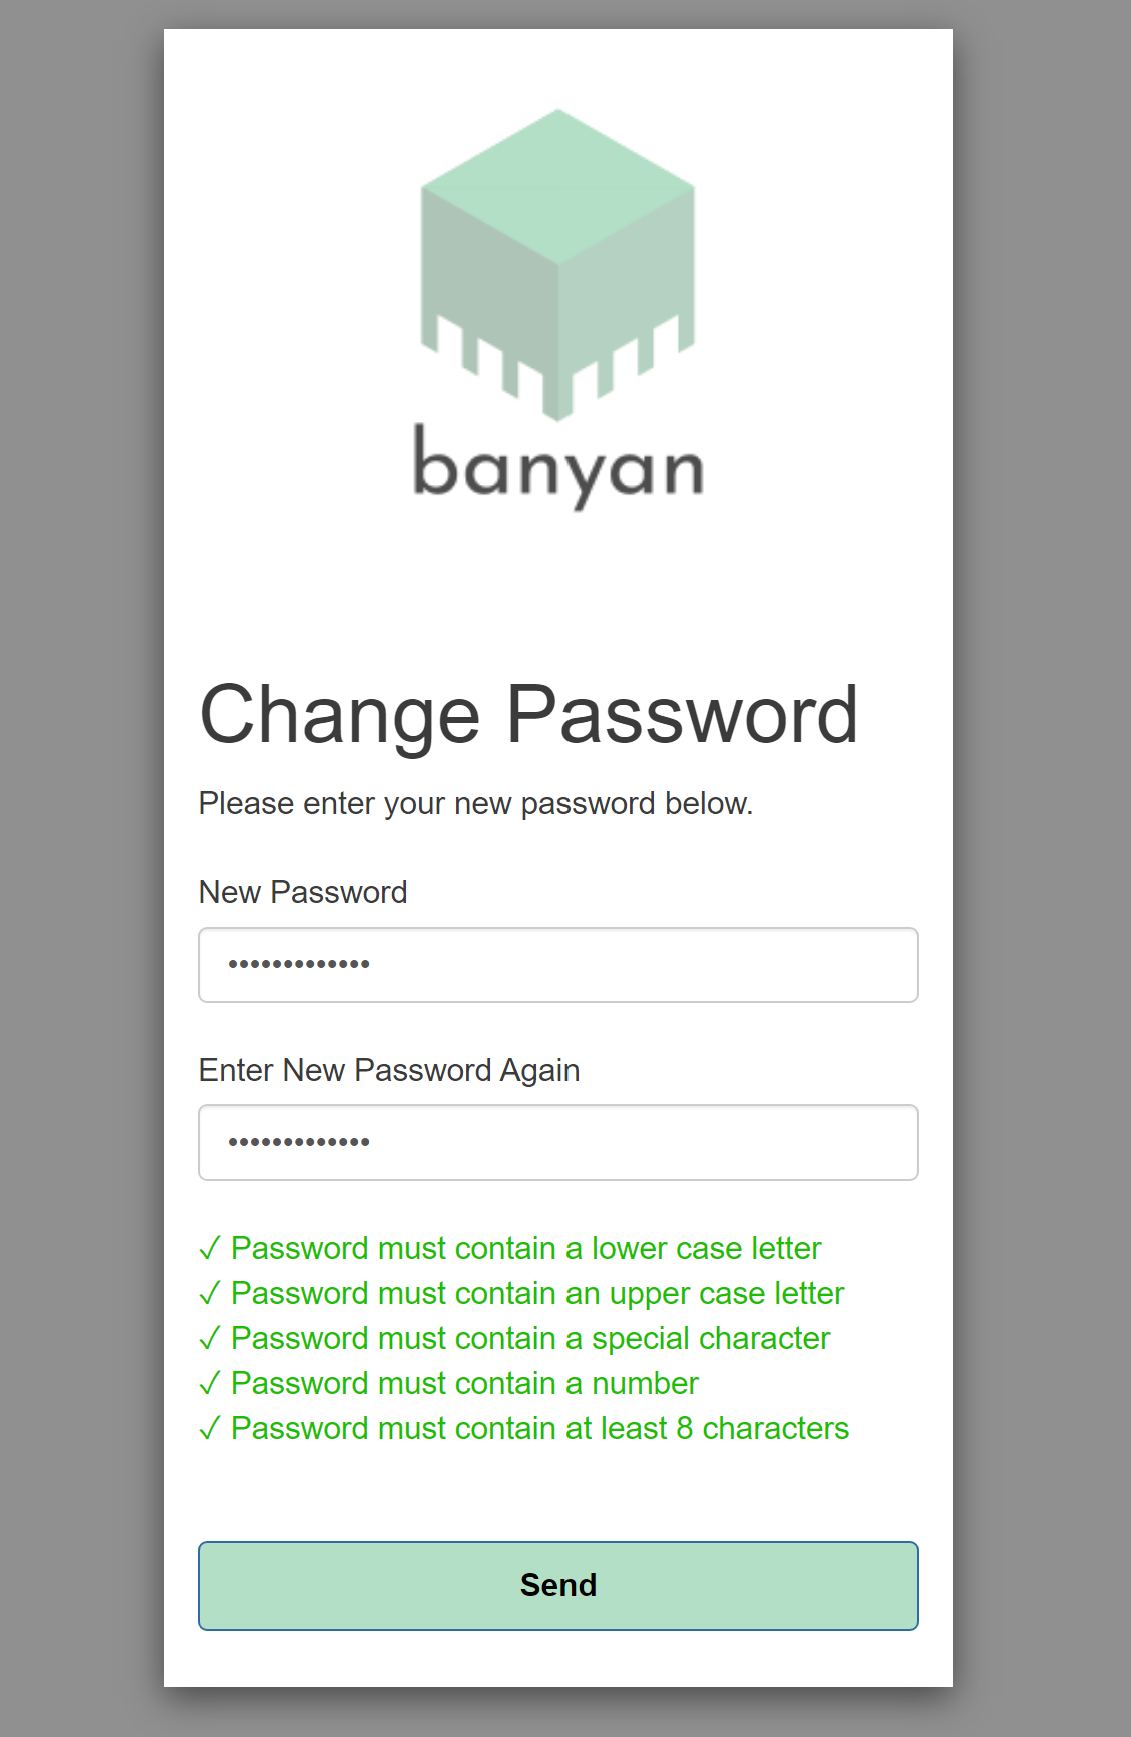
- Enter in your new password.
- You can now sign into the Banyan dashboard here!
Connecting Your Banyan and AWS Accounts
To use Banyan, you must first grant Banyan sufficient permissions to create and manage compute resources in your AWS account. Banyan uses a cross-account role to connect your Banyan account to your AWS account. You must configure settings both in the AWS Management Console and in the Bayan dashboard. Once you have configured your AWS account with Banyan, you cannot asssociate your Banyan account with a different AWS account.
- Sign into your Banyan account and go to the Banyan Dashboard.
- Click on Account and scroll down to the Connect to AWS section.
- Copy the External ID for later use in Step 2, and do not close this page.
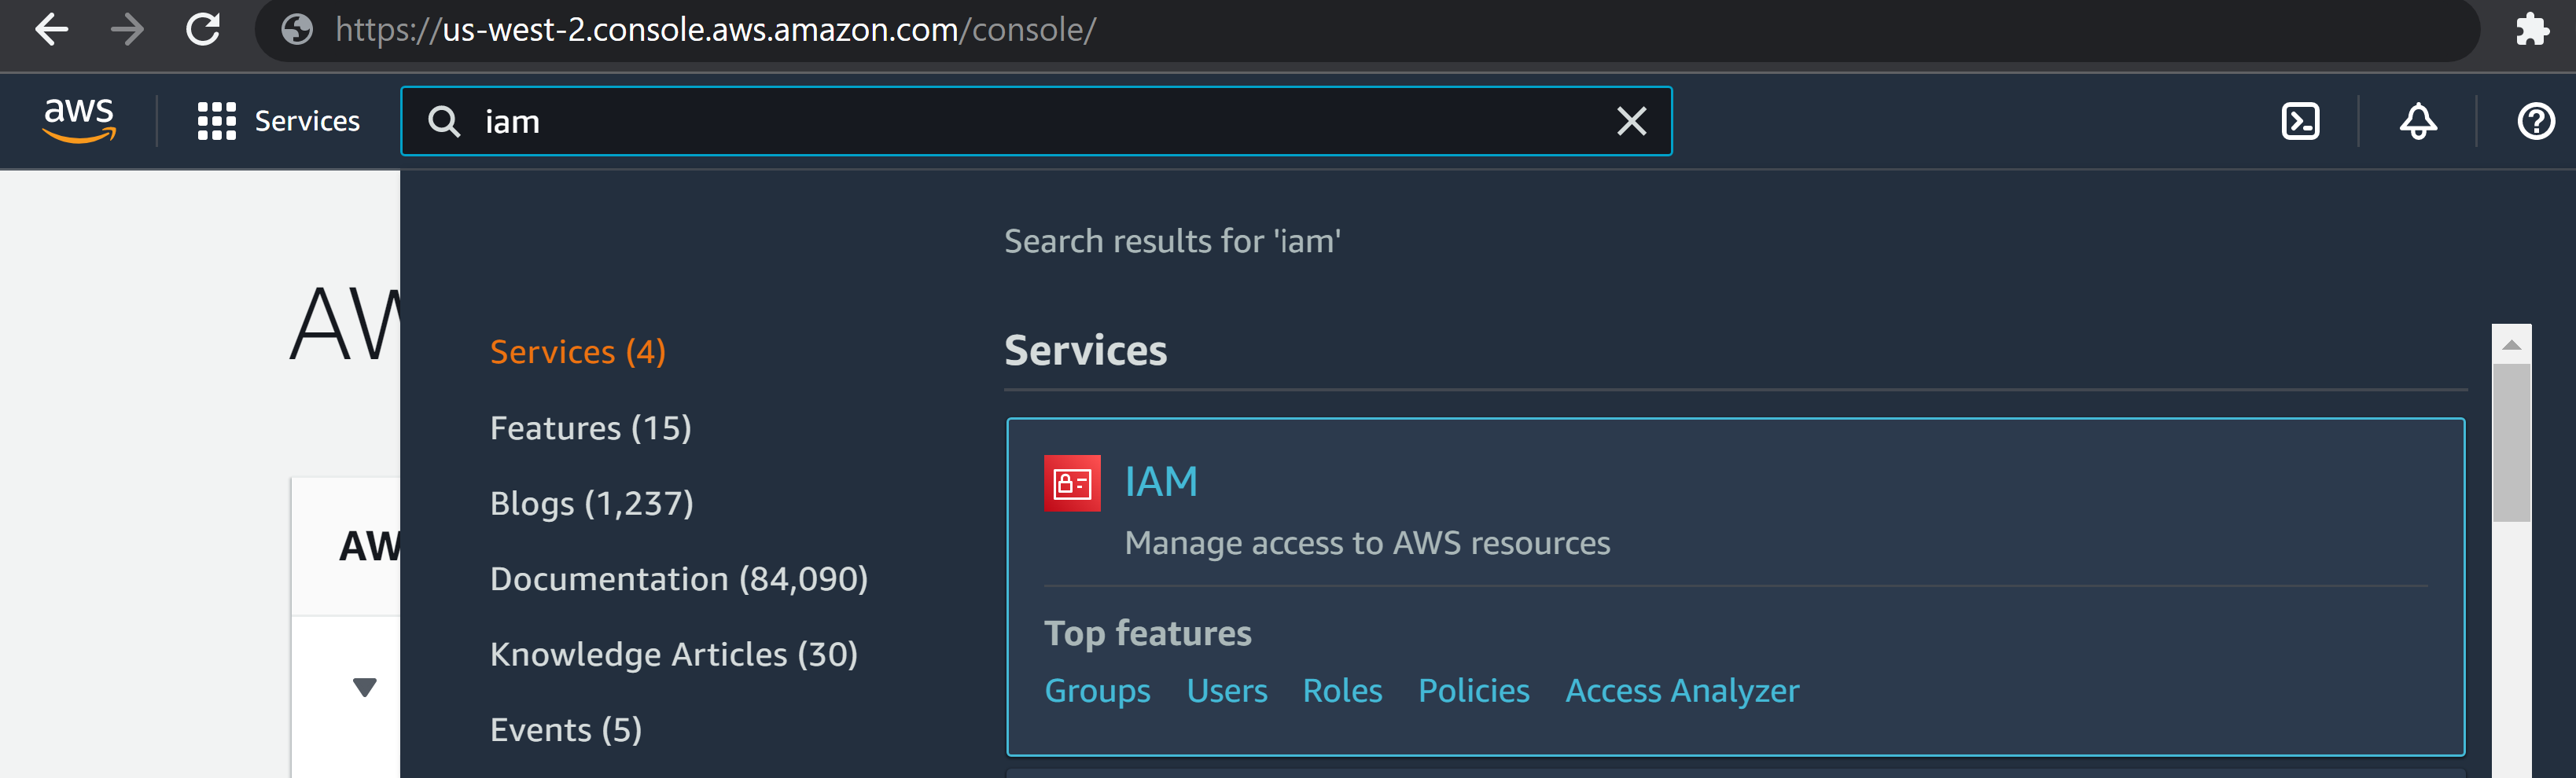
- Sign into the AWS Management Console and
go to the IAM service.
- Click the Policies tab in the sidebar.
-
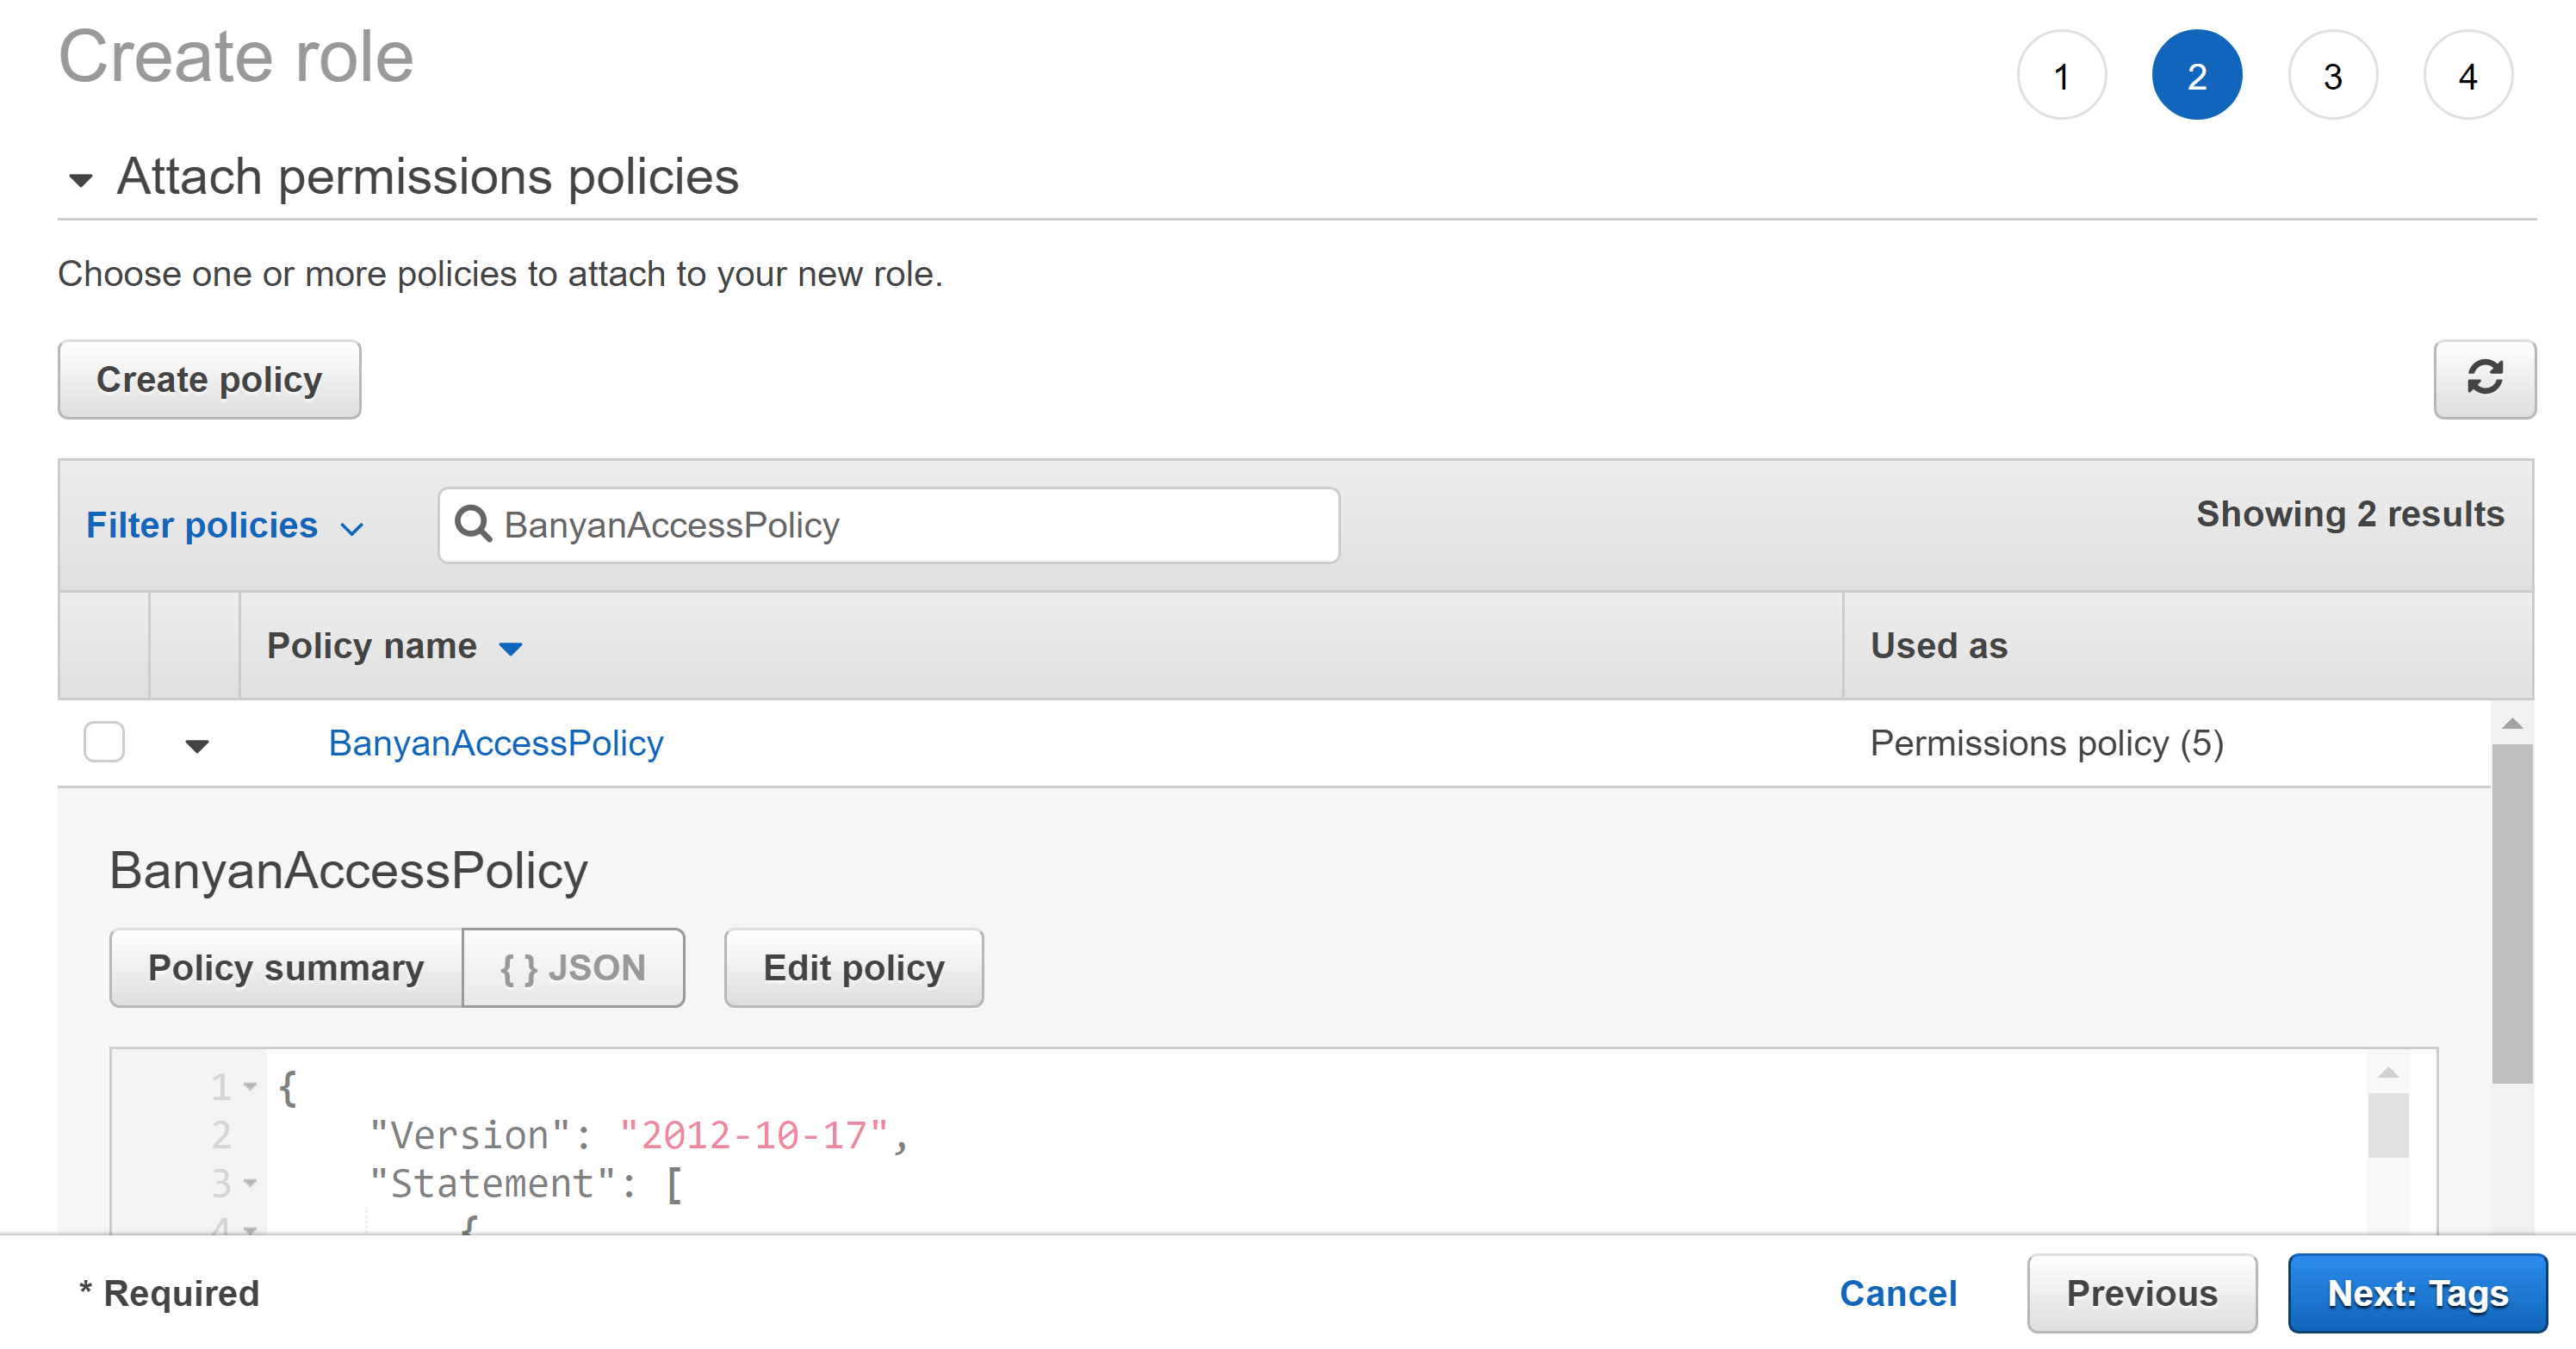
Click Create Policy to create a new IAM policy.
a. Click the JSON tab.
b. Paste the following policy into the editor.View BanyanAccessPolicy
{
    "Version": "2012-10-17",
    "Statement": [
        {
            "Sid": "BanyanGeneral",
            "Effect": "Allow",
            "Action": [
                "apigateway:*",
                "autoscaling:DescribeAutoScalingGroups",
                "autoscaling:DescribeAutoScalingInstances",
                "autoscaling:CreateAutoScalingGroup",
                "autoscaling:PutNotificationConfiguration",
                "autoscaling:UpdateAutoScalingGroup",
                "autoscaling:PutScalingPolicy",
                "autoscaling:DescribeScalingActivities",
                "autoscaling:DeleteAutoScalingGroup",
                "autoscaling:DeletePolicy",
                "autoscaling:DisableMetricsCollection",
                "autoscaling:EnableMetricsCollection",
                "autoscaling:DescribeTags",
                "autoscaling:SetDesiredCapacity",
                "autoscaling:SetInstanceHealth",
                "autoscaling:TerminateInstanceInAutoScalingGroup",
                "ce:GetCostAndUsage",
                "cloudformation:DescribeStackEvents",
                "cloudformation:DescribeStackResource",
                "cloudformation:DescribeStackResources",
                "cloudformation:DescribeStacks",
                "cloudformation:ListStacks",
                "cloudformation:GetTemplate",
                "cloudformation:CreateChangeSet",
                "cloudformation:CreateStack",
                "cloudformation:DeleteStack",
                "cloudformation:UpdateStack",
                "cloudwatch:PutDashboard",
                "cloudwatch:ListDashboards",
                "cloudwatch:DeleteDashboards",
                "cloudwatch:GetDashboard",
                "dynamodb:DescribeTable",
                "dynamodb:ListTagsOfResource",
                "dynamodb:CreateTable",
                "dynamodb:DeleteTable",
                "dynamodb:GetItem",
                "dynamodb:PutItem",
                "dynamodb:Query",
                "dynamodb:TagResource",
                "dynamodb:DeleteItem",
                "dynamodb:ListTables",
                "ec2:CreateLaunchTemplate",
                "ec2:CreateLaunchTemplateVersion",
                "ec2:ModifyLaunchTemplate",
                "ec2:DeleteLaunchTemplate",
                "ec2:DescribeLaunchTemplates",
                "ec2:DescribeLaunchTemplateVersions",
                "ec2:DescribeKeyPairs",
                "ec2:DescribeRegions",
                "ec2:DescribeVpcs",
                "ec2:DescribeSubnets",
                "ec2:DescribeSecurityGroups",
                "ec2:DescribePlacementGroups",
                "ec2:DescribeImages",
                "ec2:DescribeInstances",
                "ec2:DescribeInstanceStatus",
                "ec2:DescribeInstanceTypes",
                "ec2:DescribeInstanceTypeOfferings",
                "ec2:DescribeSnapshots",
                "ec2:DescribeVolumes",
                "ec2:DescribeVpcAttribute",
                "ec2:DescribeAddresses",
                "ec2:CreateTags",
                "ec2:DescribeNetworkInterfaces",
                "ec2:DescribeAvailabilityZones",
                "ec2:CreateVpc",
                "ec2:ModifyVpcAttribute",
                "ec2:DescribeNatGateways",
                "ec2:CreateNatGateway",
                "ec2:DescribeInternetGateways",
                "ec2:CreateInternetGateway",
                "ec2:AttachInternetGateway",
                "ec2:DescribeRouteTables",
                "ec2:CreateRoute",
                "ec2:CreateRouteTable",
                "ec2:AssociateRouteTable",
                "ec2:CreateSubnet",
                "ec2:ModifySubnetAttribute",
                "ec2:CreateVolume",
                "ec2:RunInstances",
                "ec2:AllocateAddress",
                "ec2:AssociateAddress",
                "ec2:AttachNetworkInterface",
                "ec2:AuthorizeSecurityGroupEgress",
                "ec2:AuthorizeSecurityGroupIngress",
                "ec2:CreateNetworkInterface",
                "ec2:CreateSecurityGroup",
                "ec2:ModifyVolumeAttribute",
                "ec2:ModifyNetworkInterfaceAttribute",
                "ec2:DeleteNetworkInterface",
                "ec2:DeleteVolume",
                "ec2:TerminateInstances",
                "ec2:DeleteSecurityGroup",
                "ec2:DisassociateAddress",
                "ec2:RevokeSecurityGroupIngress",
                "ec2:RevokeSecurityGroupEgress",
                "ec2:ReleaseAddress",
                "ec2:CreatePlacementGroup",
                "ec2:DeletePlacementGroup",
                "ec2:DescribeNetworkInterfaceAttribute",
                "ec2:AttachVolume",
                "ec2:DescribeInstanceAttribute",
                "ec2messages:AcknowledgeMessage",
                "ec2messages:DeleteMessage",
                "ec2messages:FailMessage",
                "ec2messages:GetEndpoint",
                "ec2messages:GetMessages",
                "ec2messages:SendReply",
                "ecr:CreateRepository",
                "ecr:DeleteRepository",
                "ecr:DescribeRepositories",
                "ecr:*",
                "elasticfilesystem:*",
                "execute-api:Invoke",
                "fsx:*",
                "iam:DeleteRole",
                "iam:CreateInstanceProfile",
                "iam:DeleteInstanceProfile",
                "iam:AddRoleToInstanceProfile",
                "iam:RemoveRoleFromInstanceProfile",
                "iam:CreatePolicy",
                "iam:DeletePolicy",
                "iam:GetRolePolicy",
                "iam:GetPolicy",
                "iam:ListAttachedRolePolicies",
                "iam:ListPolicyVersions",
                "imagebuilder:*",
                "lambda:CreateFunction",
                "lambda:DeleteFunction",
                "lambda:GetFunctionConfiguration",
                "lambda:GetFunction",
                "lambda:InvokeFunction",
                "lambda:AddPermission",
                "lambda:RemovePermission",
                "logs:DeleteLogGroup",
                "logs:PutRetentionPolicy",
                "logs:DescribeLogGroups",
                "logs:CreateLogGroup",
                "route53:ChangeResourceRecordSets",
                "route53:ChangeTagsForResource",
                "route53:CreateHostedZone",
                "route53:DeleteHostedZone",
                "route53:GetChange",
                "route53:GetHostedZone",
                "route53:ListResourceRecordSets",
                "route53:ListQueryLoggingConfigs",
                "s3:*",
                "sns:ListTopics",
                "sns:GetTopicAttributes",
                "sns:CreateTopic",
                "sns:Subscribe",
                "sns:Unsubscribe",
                "sns:DeleteTopic",
                "SNS:Publish",
                "sqs:GetQueueAttributes",
                "sqs:CreateQueue",
                "sqs:DeleteMessage",
                "sqs:DeleteQueue",
                "sqs:GetQueueUrl",
                "sqs:ListQueues",
                "sqs:ReceiveMessage",
                "sqs:SendMessage",
                "sqs:SetQueueAttributes",
                "sqs:TagQueue",
                "sqs:ChangeMessageVisibility",
                "ssm:*",
                "ssmmessages:CreateControlChannel",
                "ssmmessages:CreateDataChannel",
                "ssmmessages:OpenControlChannel",
                "ssmmessages:OpenDataChannel"
            ],
            "Resource": [
                "*"
            ]
        },
        {
            "Sid": "IAMRole",
            "Effect": "Allow",
            "Action": [
                "iam:AttachRolePolicy",
                "iam:DetachRolePolicy",
                "iam:PassRole",
                "iam:CreateRole",
                "iam:CreateServiceLinkedRole",
                "iam:DeleteRole",
                "iam:GetRole",
                "iam:TagRole",
                "iam:SimulatePrincipalPolicy",
                "iam:PutRolePolicy",
                "iam:DeleteRolePolicy"
            ],
            "Resource": [
                "arn:aws:iam::*:role/parallelcluster*",
                "arn:aws:iam::*:role/aws-service-role/*",
                "arn:aws:iam::*:role/*banyan-pcluster3-stack*"
            ]
        },
        {
            "Condition": {
                "ArnLike": {
                    "iam:PolicyARN": [
                        "arn:aws:iam::*:policy/parallelcluster*",
                        "arn:aws:iam::*:policy/parallelcluster/*",
                        "arn:aws:iam::aws:policy/CloudWatchAgentServerPolicy",
                        "arn:aws:iam::aws:policy/AmazonSSMManagedInstanceCore",
                        "arn:aws:iam::aws:policy/AWSBatchFullAccess",
                        "arn:aws:iam::aws:policy/AmazonS3ReadOnlyAccess",
                        "arn:aws:iam::aws:policy/service-role/AWSBatchServiceRole",
                        "arn:aws:iam::aws:policy/service-role/AmazonEC2ContainerServiceforEC2Role",
                        "arn:aws:iam::aws:policy/service-role/AmazonECSTaskExecutionRolePolicy",
                        "arn:aws:iam::aws:policy/service-role/AmazonEC2SpotFleetTaggingRole",
                        "arn:aws:iam::aws:policy/EC2InstanceProfileForImageBuilder",
                        "arn:aws:iam::aws:policy/service-role/AWSLambdaBasicExecutionRole",
                        "arn:aws:iam::*:policy/Banyan*",
                        "arn:aws:iam::*:policy/banyan-pcluster3-stack*"
                    ]
                }
            },
            "Action": [
                "iam:AttachRolePolicy",
                "iam:DetachRolePolicy"
            ],
            "Resource": [
                "arn:aws:iam::*:role/parallelcluster/*"
            ],
            "Effect": "Allow",
            "Sid": "IamPolicy"
        }
    ]
}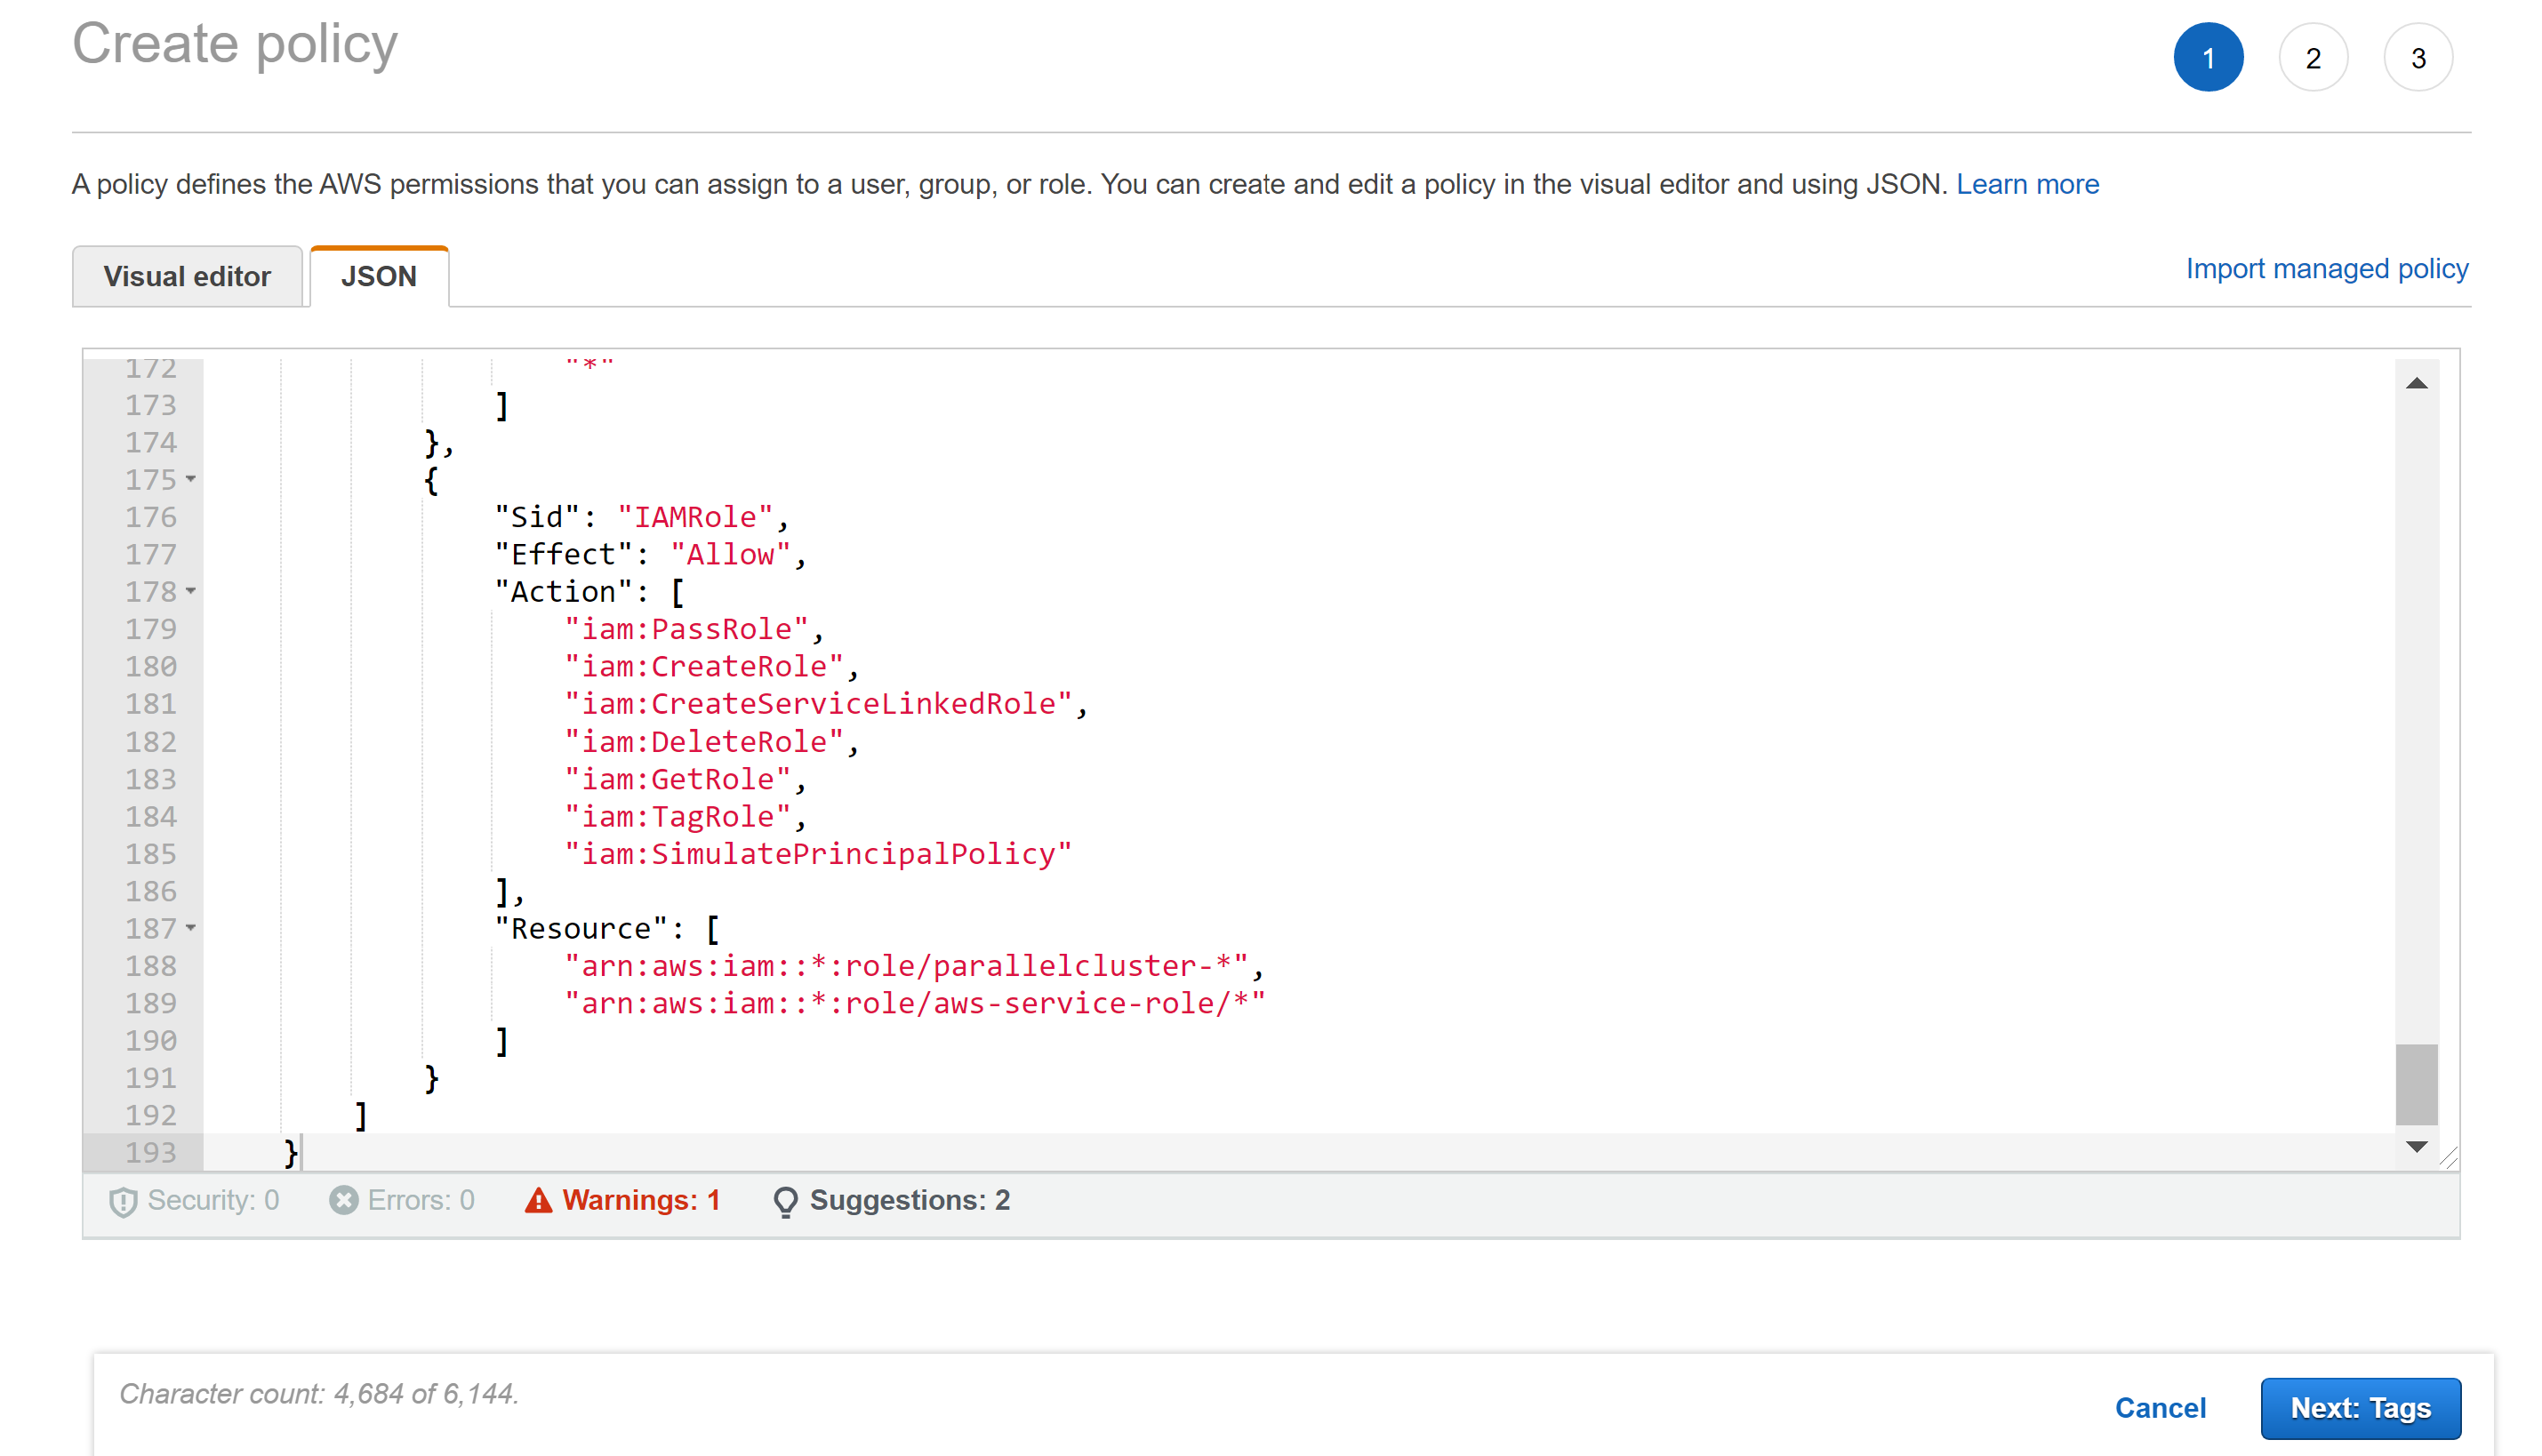
c. Click Next: Tags, then Next: Review.
d. In the Name field, enterBanyanAccessPolicy.
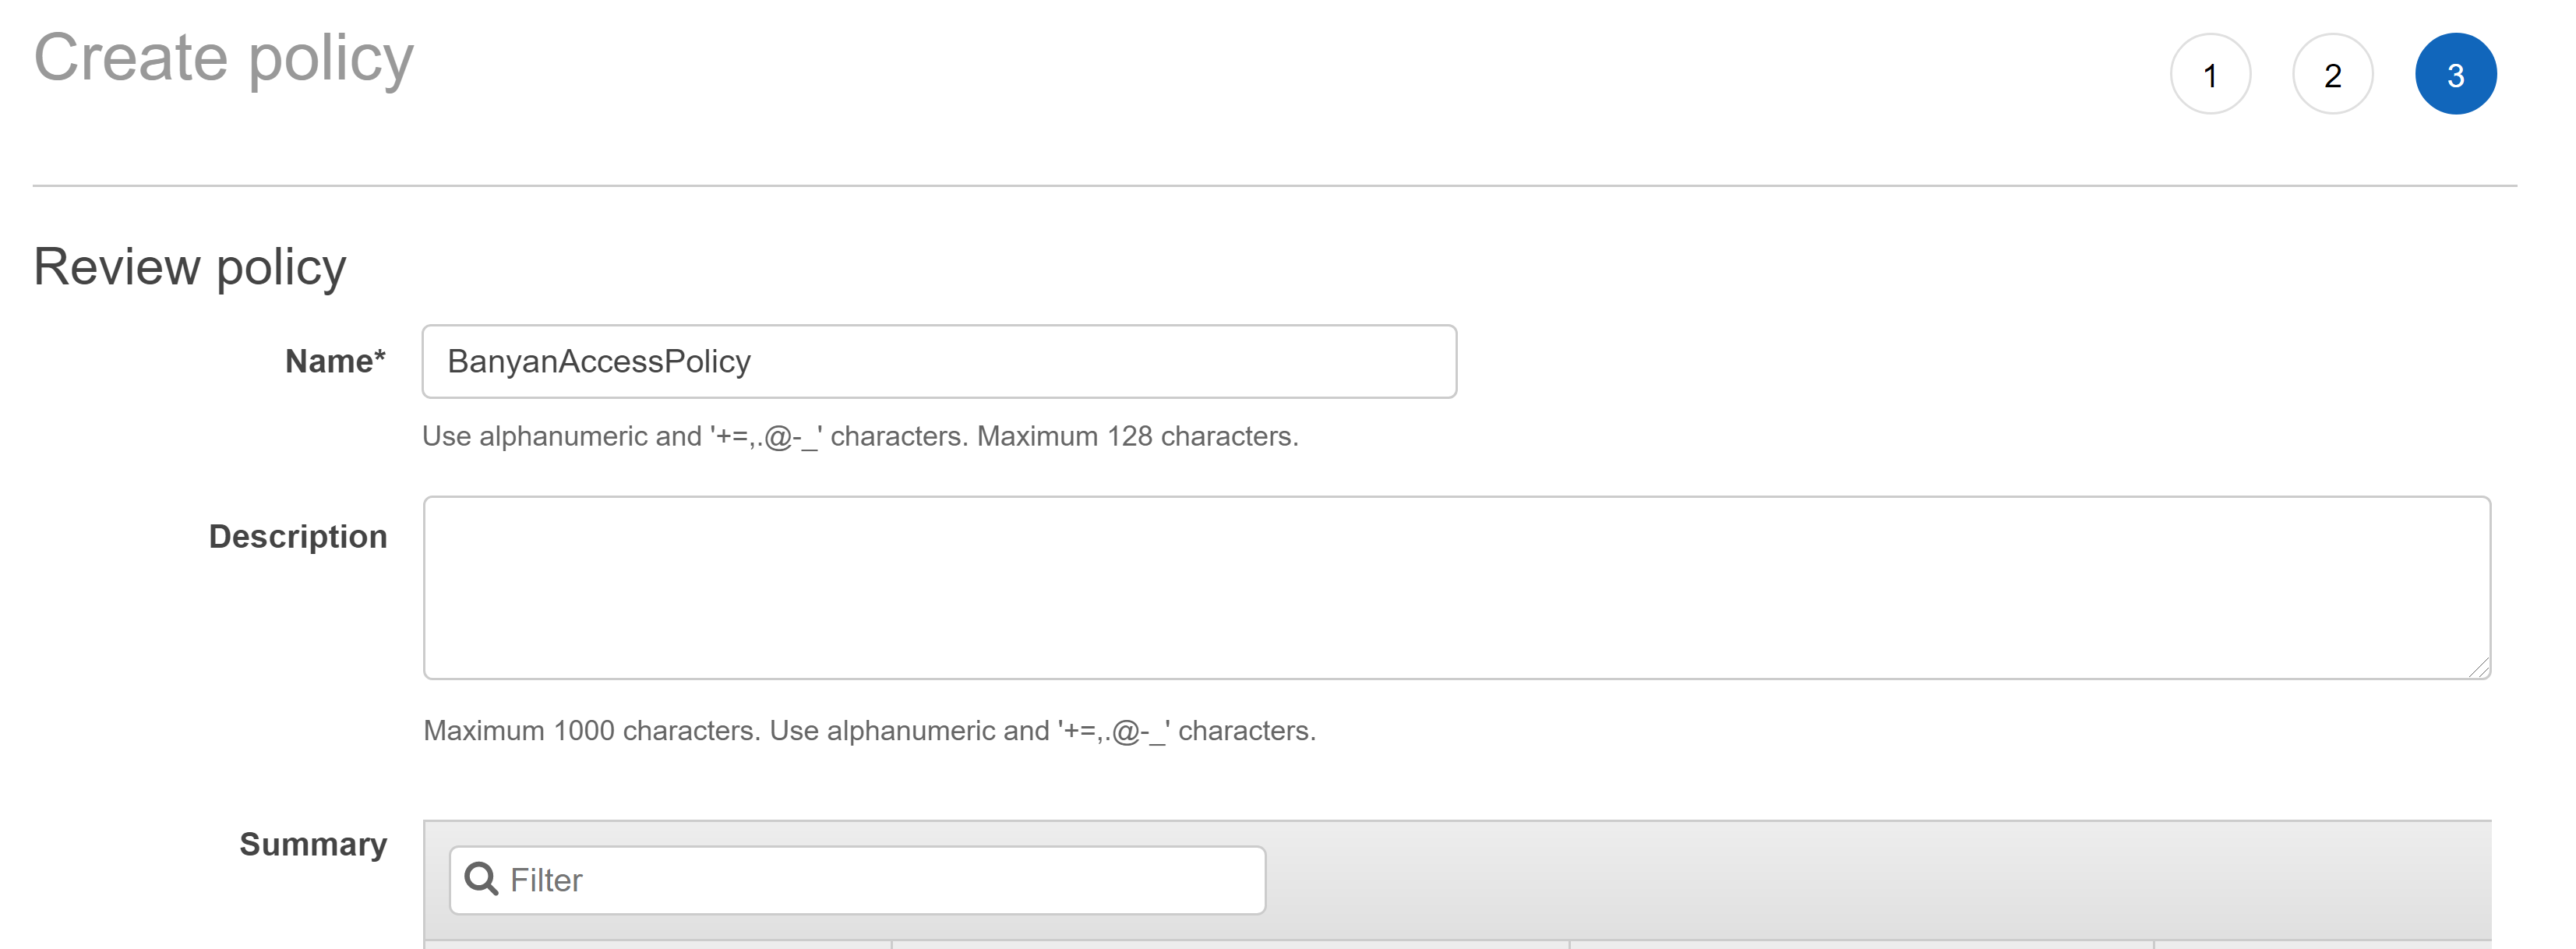 e. Scroll down and click Create Policy.
 -
Return to the IAM service in the AWS Management Console.
- Click on the Roles tab in the sidebar.
- Select Create Role to create a new IAM role.
a. Under Select type of trusted entity, select Another AWS account.
b. In the Account ID field, enter the Banyan AWS account ID814618936233
c. Select Require external ID.
d. In the External ID field, enter the external ID you acquired from the Banyan Dashboard in the previous step.
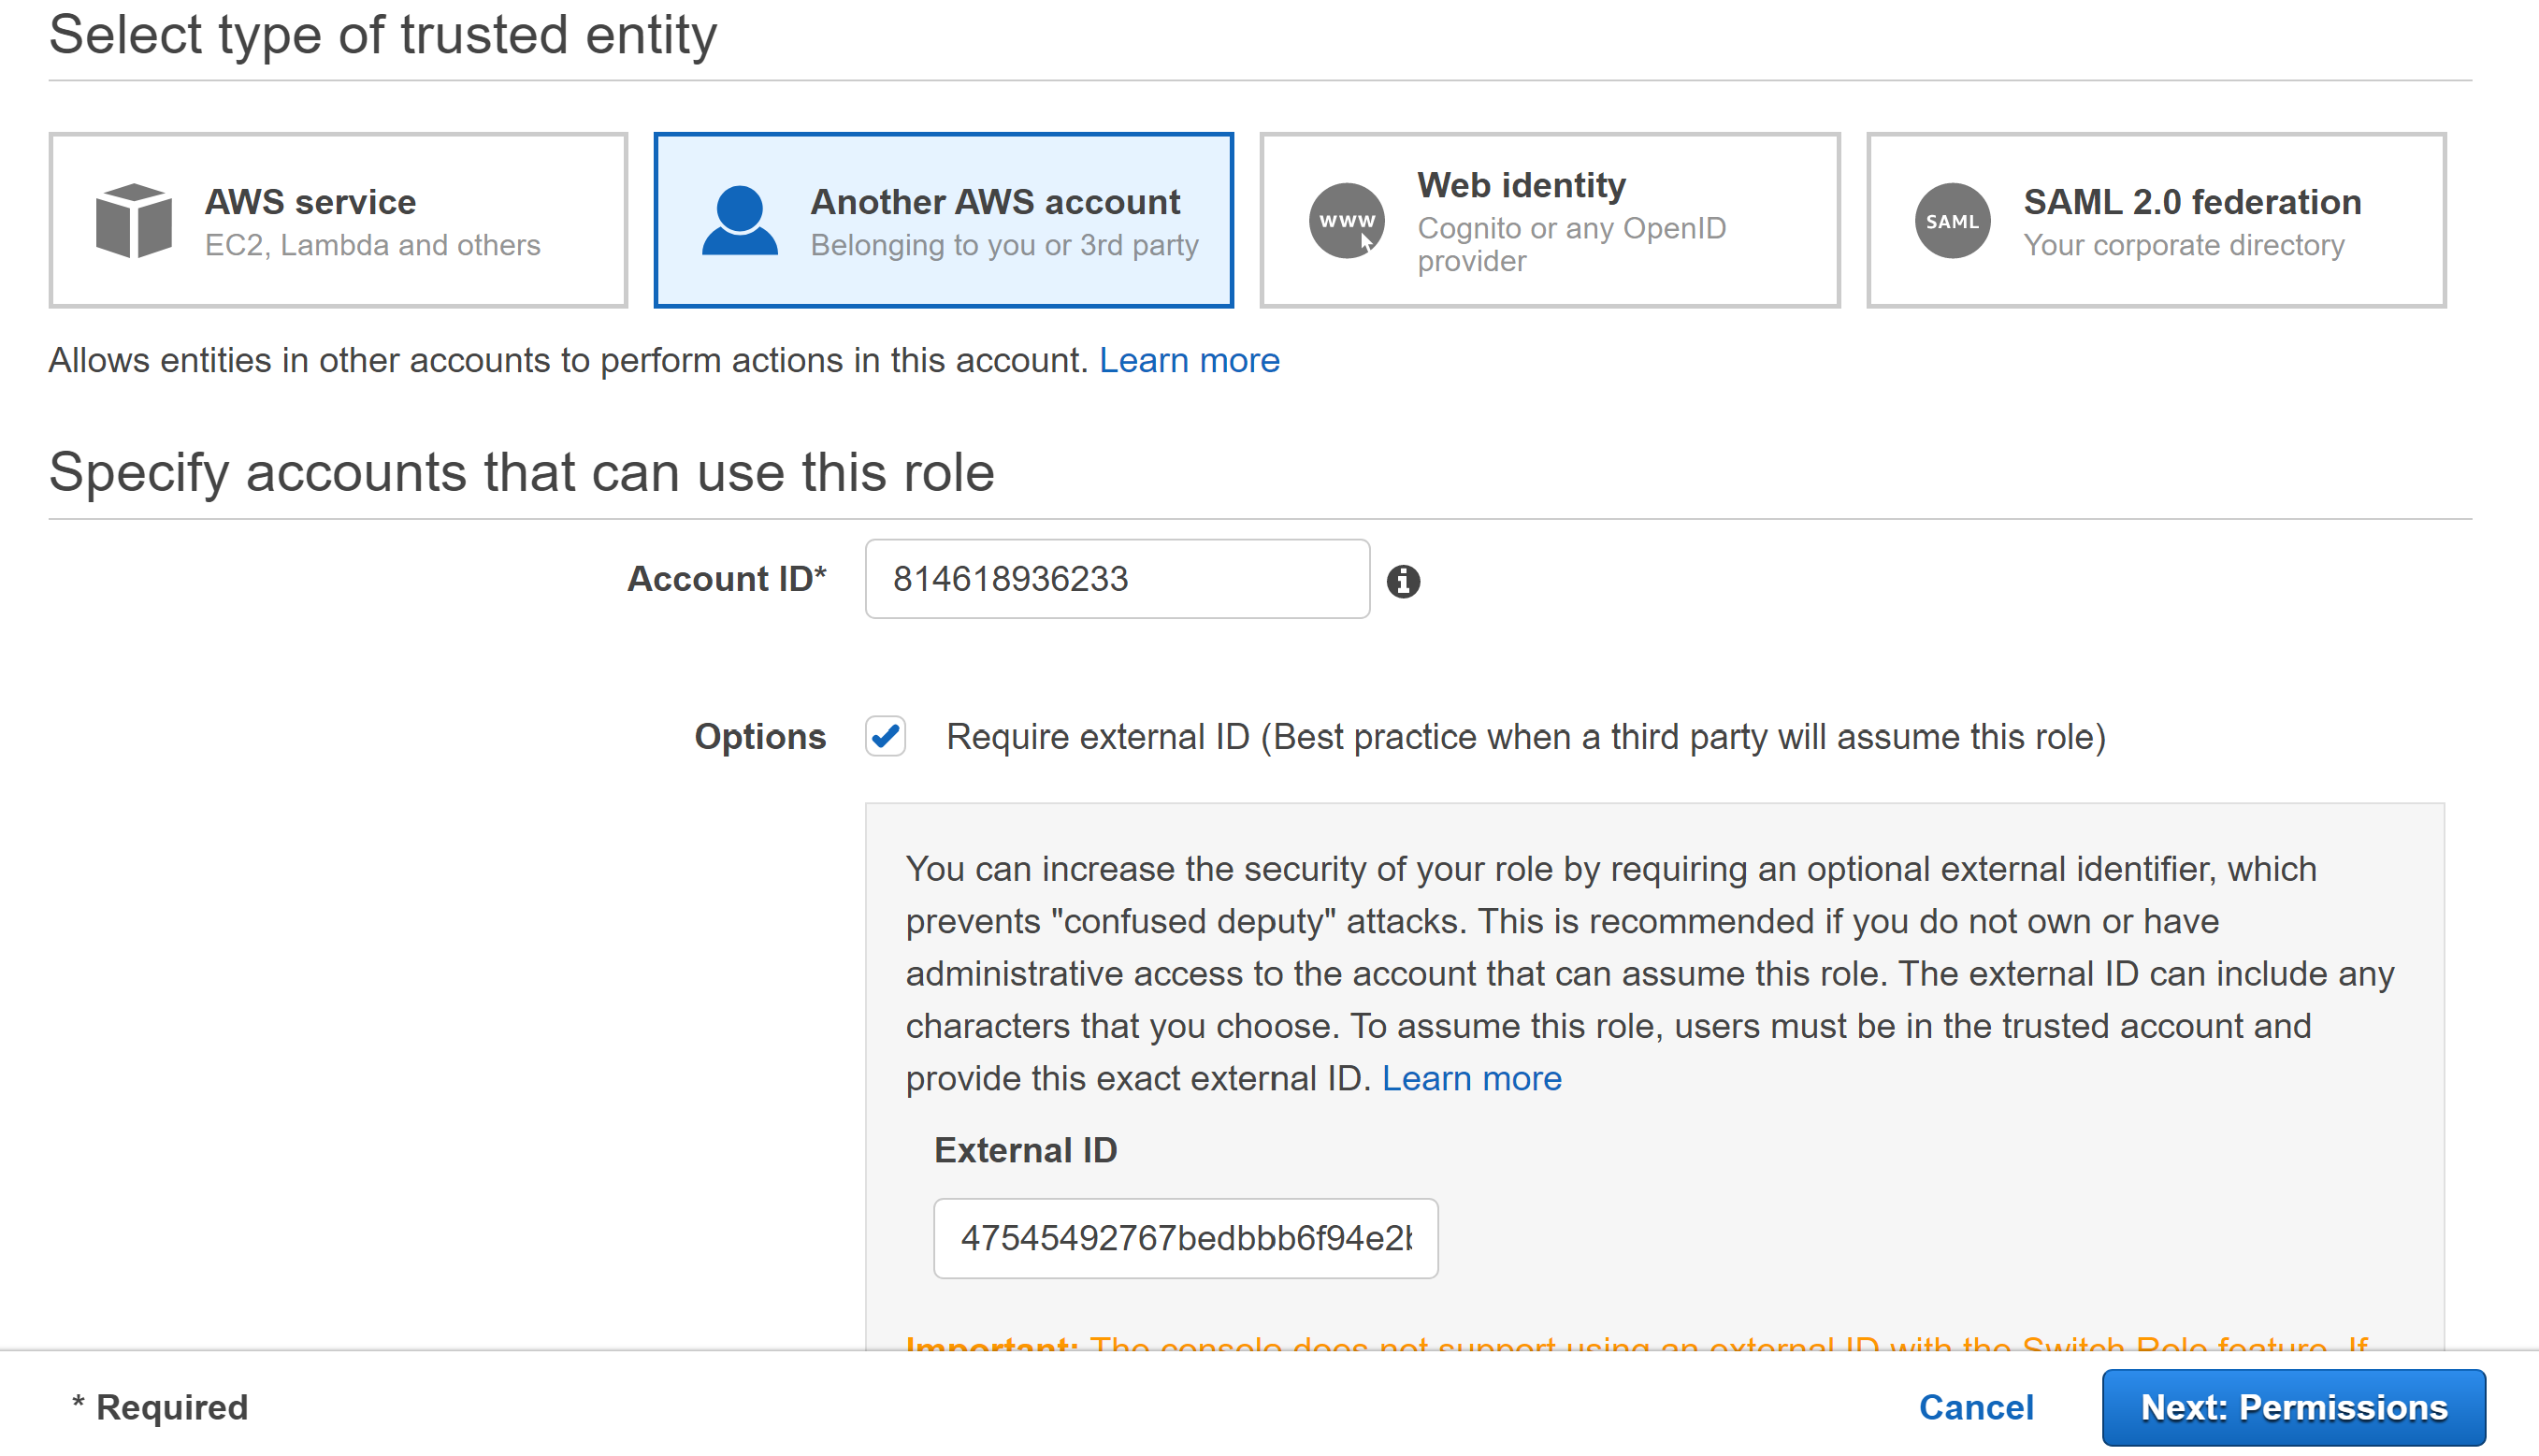 e. Click Next: Permissions.
f. Search forBanyanAccessPolicy, and select it.
 g. Click Next: Tags.
h. Click Next: Review.
i. In the Role name field, enterBanyanAccessRole.
j. Click Create role to create the role. - Search for the role you just created, click on it, and copy the Role ARN.

- Return to the Account page you copied the external ID from in the Banyan dashboard in the first step
- Enter in role ARN you copied in the previous step.
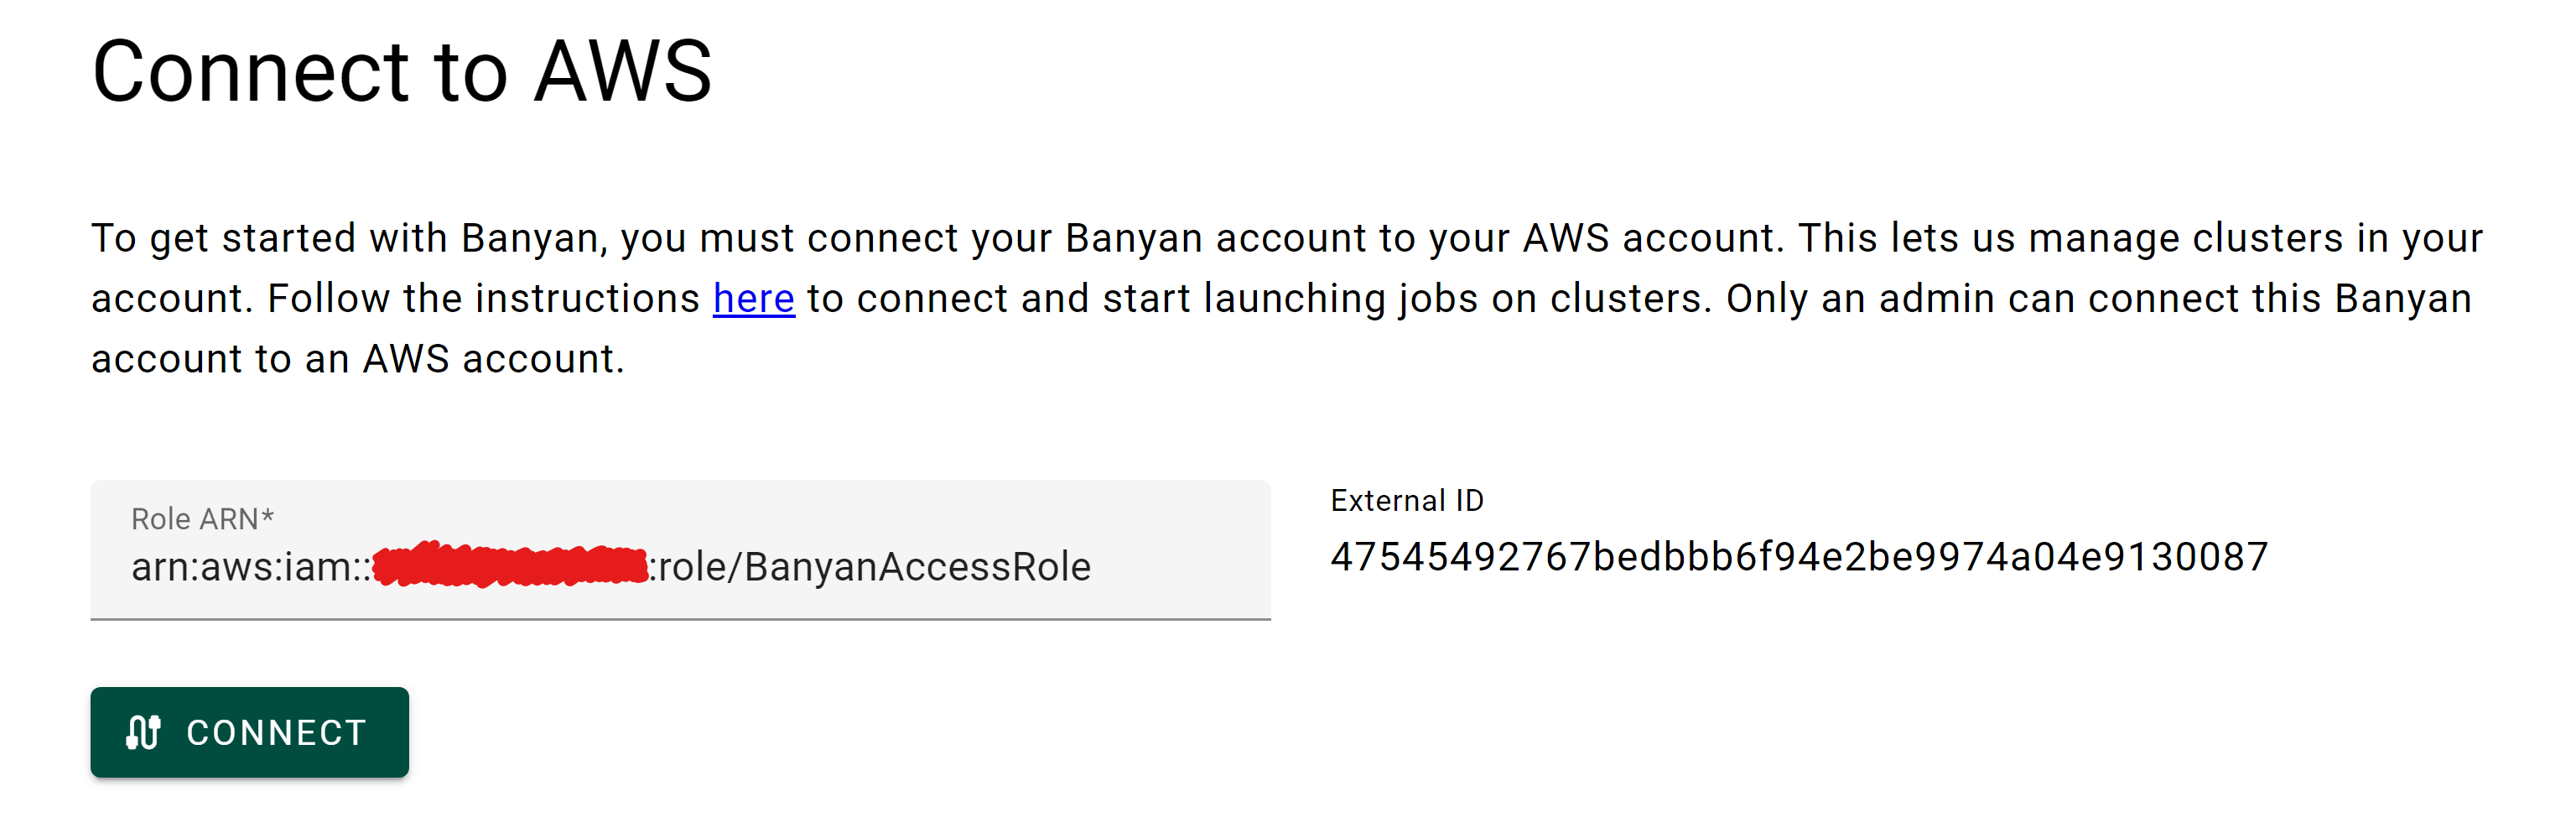
- Click Connect.
- The form should now be grayed out. Your Banyan account is now connected with your AWS account!
Billing
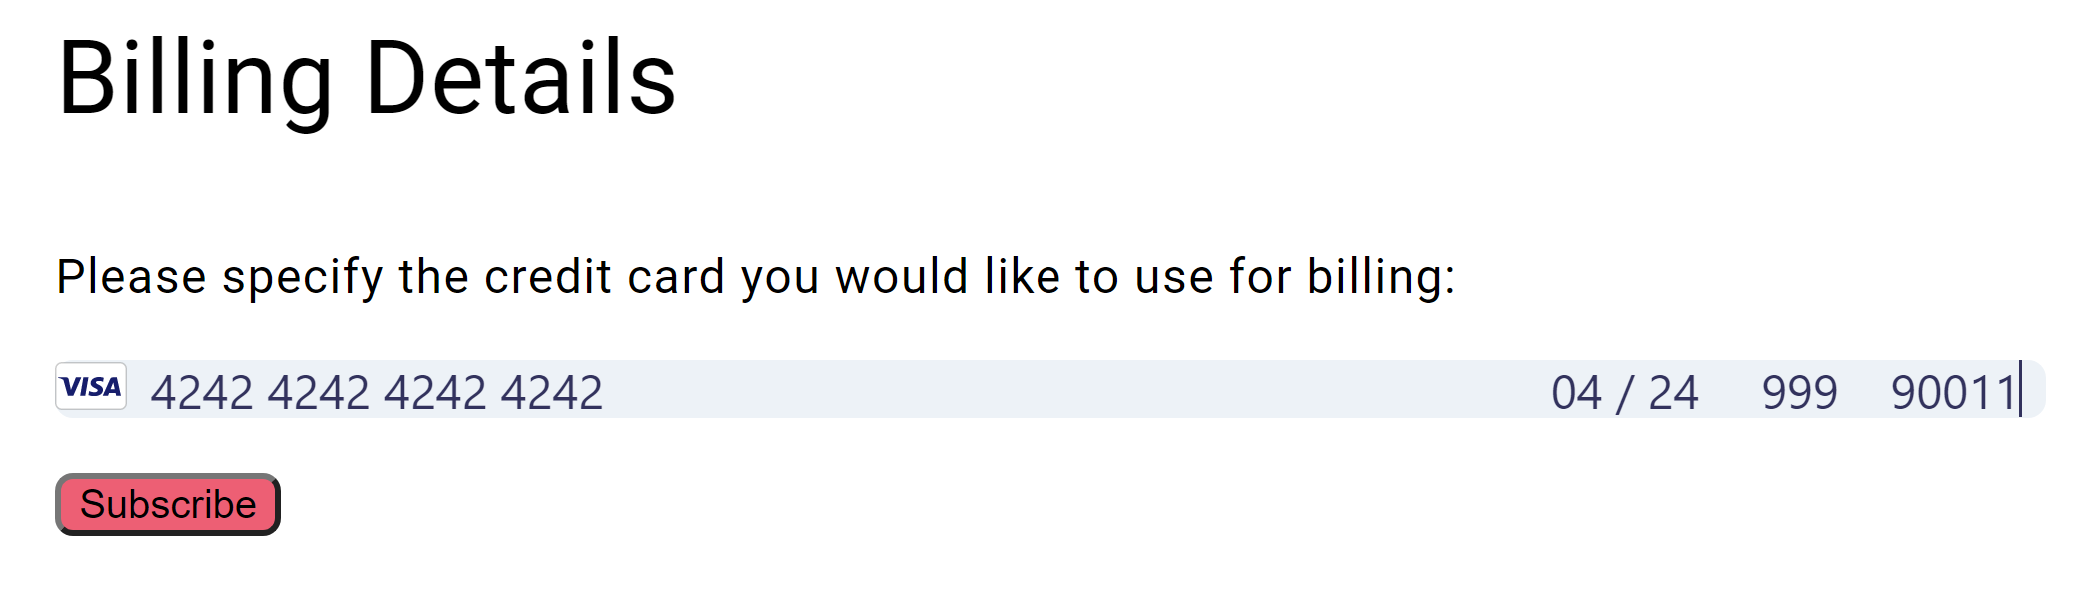
To use your Banyan account, you must first set up billing here. See here for more details on pricing.
- Sign into your Banyan account and go to the Banyan Dashboard.
- Click on Billing.
- Enter in the details of the credit card you would like to use for billing.
An invoice will be automatically billed to this credit card monthly.
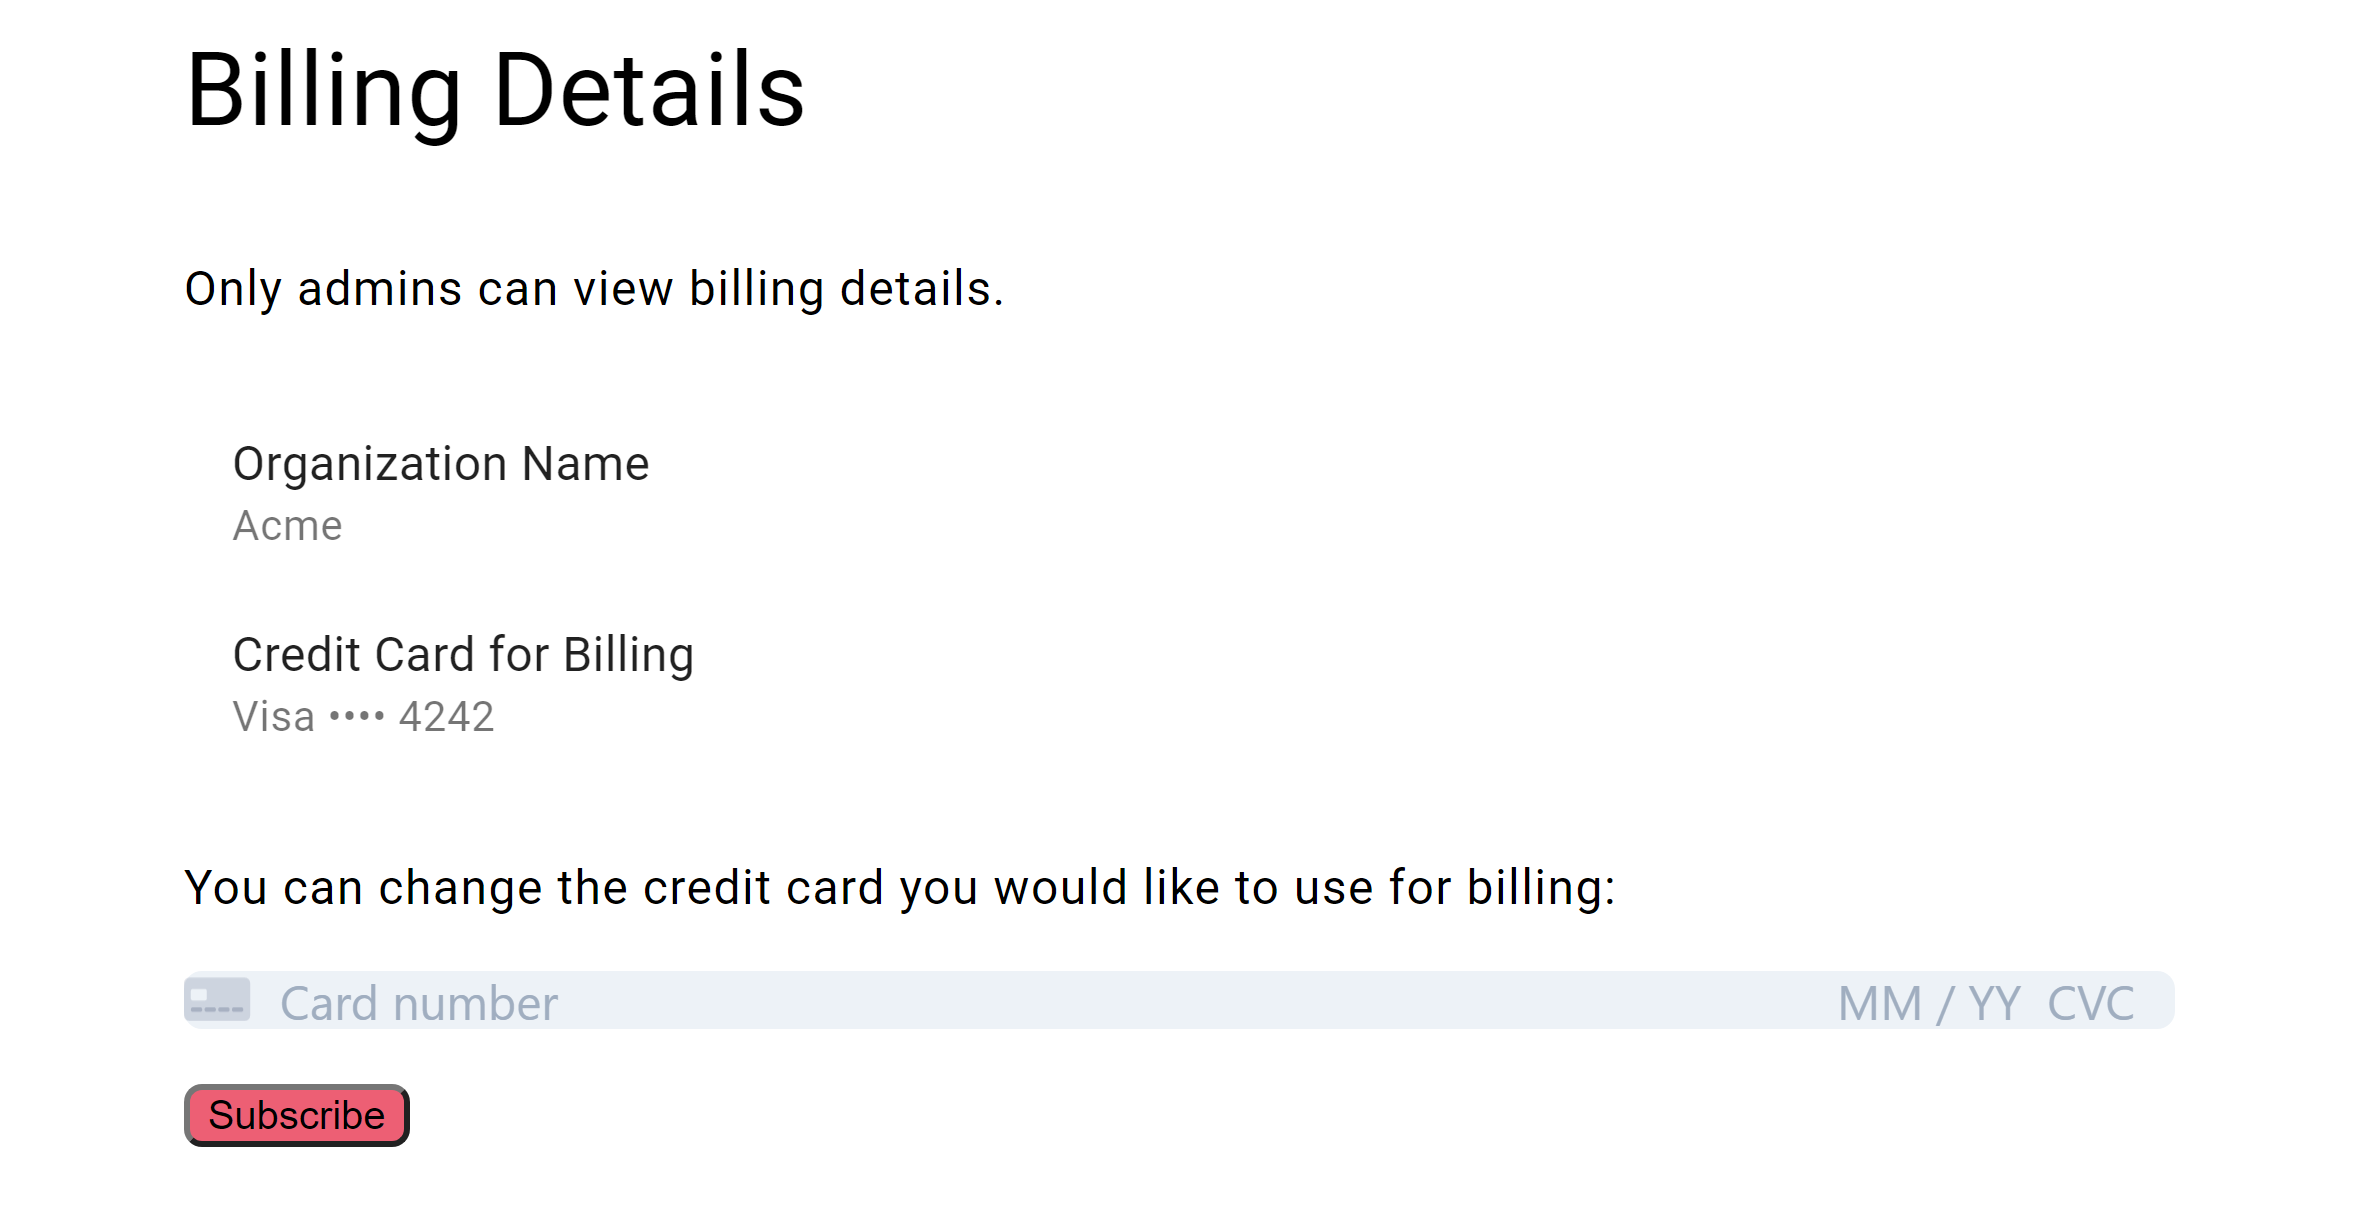
- You may change the credit card that you use for billing by filling out the form again.
Use the Dashboard
Visit banyancomputing.com/dashboard to:
- Manage auto-scaling clusters that run in the cloud and provide the compute power for running computing sessions at any scale.
- View computing sessions (info, logs, etc.) both past and currently running.
- View and manage members of your organization's account.
- Manage your account and billing.
Find out how to create and manage clusters using the dashboard.
Use a Client Library
You use the Julia client library or the Python client library to create "sessions". A session is essentially a connection
to a cluster that lets you process data on the cluster. Once a session is started, you may
use functions in BanyanArrays.jl or BanyanDataFrames.jl
to process data directly on the cluster. Computing is automatically parallelized across nodes
that make up the cluster.
Creating a new project with Banyan
You can either create a new Julia project or a new Python project. You can use both Julia and Python to start/manage sessions and run code on the same clusters.
Creating a new Julia project
- Download and install Julia.
- Download and set up up VS Code with the Julia extension. (optional)
- Create a Julia file containing code{:target="blank"}, a Jupyter notebook, or a Julia package. (optional)_
- Add the Banyan.jl package with
] add Banyanorimport Pkg; Pkg.add("Banyan"). - Add the BanyanArrays.jl (for scalable array processing) or BanyanDataFrames.jl (for scalable data analytics) packages. (optional)
- Follow the steps below to authenticate with Banyan and with AWS when running Banyan Julia scripts
- Start sessions (cluster sessions) to run code with Banyan
Creating a new Python project
- Download and install Python >=3.8.
- Install Poetry to create and manage Python projects.
- Create a new Poetry project and add a Python file containing code.
- Add the banyan-python package to the Poetry project with
poetry add banyan-pythonand import withimport banyan as bn. - Follow the steps below to authenticate with Banyan and with AWS when running Banyan Python scripts
- Start sessions (cluster sessions) to run code with Banyan
Authenticating with AWS
To use the client library, you must provide AWS credentials. The client library uses AWS to communicate with the clusters and to manage your data. Your clusters and your data live in the AWS account that you connected with your Banyan account. Provide AWS credentials in the same way you would provide credentials when using the AWS CLI (command-line interface).
You can find your credentials on the AWS
console and provide them using the credentials file, config file, or environment variables.
Follow the instructions here
to authenticate with AWS. See here
for information on how to set environment variables to authenticate with AWS in the same
terminal/command prompt session where you are running julia.
When creating your access keys, ensure that the user has at least the following permissions:
s3:*sqs:*
To SSH into a cluster from the CLI, ensure that you have the permissions described here. Read here for more information on how to connect to a cluster with SSH.
Authenticating with Banyan
When using the Banyan Julia client library, you need to authenticate with Banyan by providing your API key and your user ID. Both of these can be found on the dashboard as described below.
Managing API Keys
To use the client library, you must first generate an API key on the dashboard. Navigate to the Account tab . If you at any time wish to generate a new API key, you can regenerate a new API key. Note that if you regenerate the API key, all current running sessions will be invalid, so be sure to destroy all current running sessions before generating a new key.
Providing Banyan Credentials
To use the client library, you must provide Banyan credentials: your user ID
and your API key. To find your user ID and API key, visit the dashboard and go to
the Account tab. The latest credentials you provide are saved in
$HOME/.banyan/banyanconfig.toml and retrieved for later use if unspecified.
Banyan checks for credentials in three places in the following order.
-
Function arguments. ALl functions for cluster and session management accept optional inputs for authenticating with Banyan. These optional arguments are:
user_idofStringapi_keyofString
-
Environment variables. Set the
BANYAN_USER_IDandBANYAN_API_KEYenvironment variables.export BANYAN_USER_ID=your_user_id export BANYAN_API_KEY=your_api_key -
Configuration file. Set credentials in the Banyan configuration file on your local system, located at
$HOME/.banyan/banyanconfig.toml. Do not modify this file directly; instead, use one of the two options above to automatically update this file. This file should contain the configuration information in the following format:[banyan] api_key = "1234567890abcdefghijklmnopqrstuv" user_id = "98876543210zyxwvutsrqponmlkjihgf" [aws] ec2_key_pair_name = "MySSHKeyPair" region = "us-west-2"
As a best practice, do not hardcode credentials in your code. To configure your
credentials for the first time, use configure as follows:
julia> using Banyan
julia> configure(user_id="98876543210zyxwvutsrqponmlkjihgf", api_key="1234567890abcdefghijklmnopqrstuv)
>>> import banyan as bn
>>> bn.configure(user_id="98876543210zyxwvutsrqponmlkjihgf", api_key="1234567890abcdefghijklmnopqrstuv)
What's Next?
After you've followed the above steps you should have the following set up:
- Your Banyan account connected to an AWS account
- You can access the Banyan dashboard
- You can use the Julia client library and/or the Python client library for Banyan
- Authenticated with AWS
- Authenticated with Banyan
- Can create a cluster
- Can connect to a cluster by starting a session
Once you have created a cluster and a session, you may use use
functions in BanyanArrays.jl or BanyanDataFrames.jl or other
Banyan libraries
to read, write, and process data directly on the cluster. You may also
run custom scripts on the cluster. Once you're finished
using the cluster, you should end the session and optionally also
destroy the cluster.